
Bake the perfect burnt basque cheesecake recipe
Have you ever wanted to make a dessert that looks incredibly impressive but is surprisingly simple to put together? Imagine a treat with a deeply golden, almost charred top that gives way to a center so creamy and light it feels like a cloud.
This iconic creation comes from the Basque region of Spain. It’s famous for its rustic, cracked appearance and a flavor that reminds many of a luxurious crème caramel. To get that perfect, mousse like texture, food expert Nagi tested a whopping 25 different versions.
Our guide walks you through every single step. You’ll learn why this method has become a global sensation for its simplicity. We’ll show you how to achieve that stunning contrast between a caramelized crust and a luxuriously airy interior every single time you bake it.
Introduction to the iconic burnt basque cheesecake recipe:
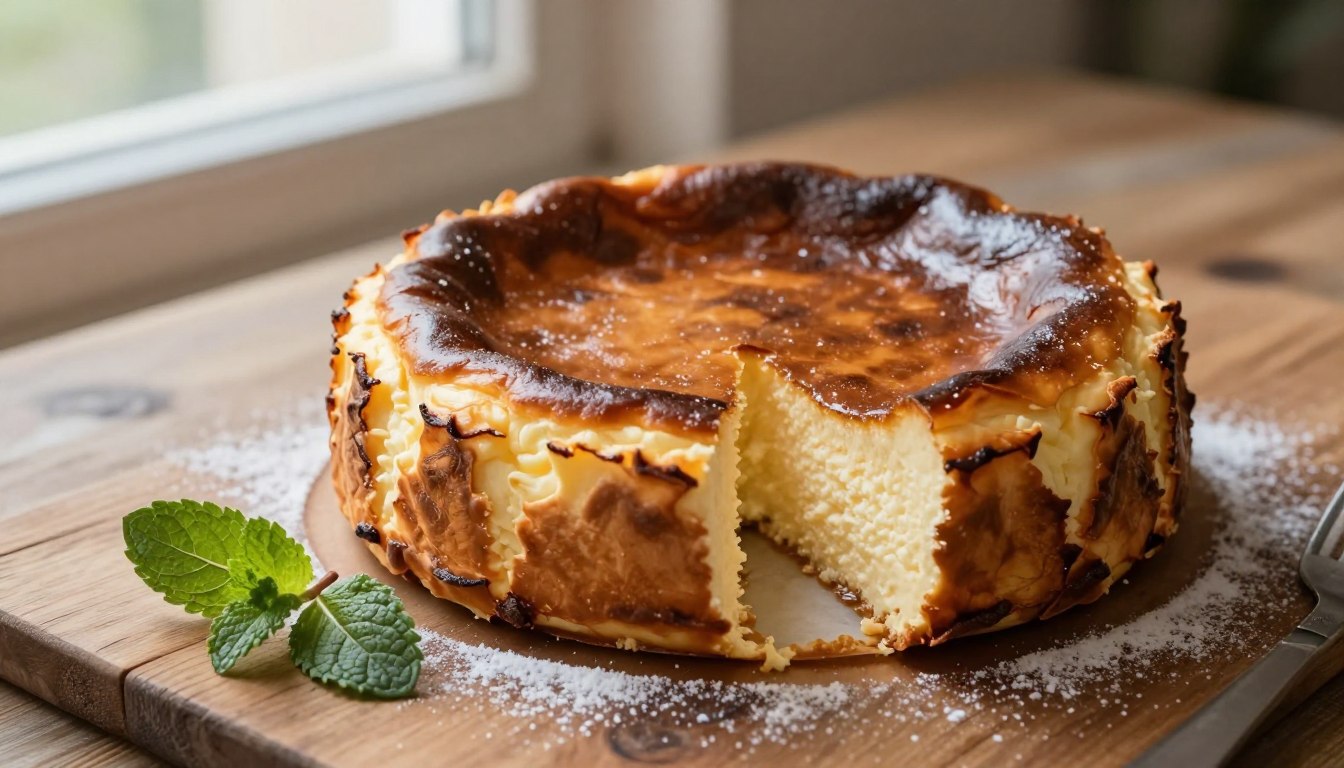
Imagine a treat where the ‘mistakes’ are actually the most celebrated features. This Basque cheesecake from Spain proudly sports a deeply caramelized top and cracked surface. It’s a bold departure from the smooth, perfect cakes you might be used to.
Discovering the unique flavor and texture
Your first bite reveals a surprising harmony. The dark top delivers rich, almost toffee like notes that many compare to crème caramel. Beneath that lies a center so light and airy it feels like a cloud on your tongue.
This mousse-like consistency is a world away from dense, traditional versions. It’s luxurious without feeling heavy. The vanilla base provides a sweet, creamy backdrop that balances the caramelized crust perfectly.
Why this recipe stands out
What makes this creation so beloved? Its rustic, unrefined look is a huge part of the charm. You don’t need to stress over a flawless finish. The contrast between the dark top and pale center is a visual signature.
This recipe has captured hearts worldwide because it offers sophisticated taste with minimal effort. It’s proof that impressive baking doesn’t require complicated techniques. You get a stunning result that feels both gourmet and approachable.
Essential ingredients and tools for success
Success in the kitchen often starts with selecting premium items and having the correct equipment on hand. This ensures your final creation turns out perfectly every time.

The go to springform pan for perfect no bake cheesecakes leakproof, nonstick, and effortlessly releases every slice. A must have in any serious home baker’s kitchen. SHOP NOW
Cream cheese, Eggs, and heavy cream
Your ingredients form the foundation. For the best fat content and texture, many bakers swear by Philadelphia cream cheese. It helps the dessert set with a luxurious feel.
Measuring your eggs by weight is a game-changer. You need exactly 220 grams of whisked eggs, which is about four to five large ones. This precision prevents a dense result.
Do not forget the heavy cream. It’s what gives the filling its signature, cloud-like consistency. This simple component makes all the difference.
The importance of parchment paper and pan prep
Your choice of lining is crucial. You must use parchment paper to line the springform pan. This creates the beautifully rustic, nubbly sides that are a hallmark of the style.
Proper pan preparation involves scrunching the parchment paper to fit snugly into the corners. This simple trick shields the edges from getting too dark during baking.
With these core ingredients and tools ready, you’re set to begin mixing. The quality of your cheese and careful prep work pave the way for a stunning dessert.
Step by step preparation process
Your journey to a creamy, cloud-like center begins with a smooth, lump-free base. This section guides you through the essential mixing stages. Follow each step carefully for a flawless result.
Mixing the Cream cheese and sugar
Start by placing your cream cheese in a large bowl. Use a stand mixer or handheld beater on medium speed. Beat it for a full two minutes until it’s completely smooth.
Next, add the sugar to the cream cheese. Beat for just about ten seconds more. This short burst helps the grains dissolve into a silky foundation.
Incorporating the cream, flour, and vanilla
Now, grab a separate bowl. Take a small portion of the cream and whisk it with the flour. This trick prevents any pesky lumps from forming later.
Pour the remaining cream and this flour mixture into your main batter. Add the vanilla extract at this stage too. This ensures its flavor spreads evenly throughout.
Finally, switch your beater to a low speed. Gently combine everything until just incorporated. Mixing gently minimizes air bubbles for that perfect, dense texture.
Mastering the “burnt basque cheesecake recipe”
The secret to that iconic, crackled appearance lies in a bold baking approach. It’s all about controlled caramelization, not accidental charring.
Understanding the technique behind the burnt surface
Your oven’s high heat is the primary driver. Set it to 220°C (425°F) for that intense environment. This rapidly browns the surface, creating deep, toffee like flavors.
The goal is a rich, golden-brown crust. It should contrast beautifully with the pale interior without burning the edges.
Air bubbles are your enemy for a smooth finish. As the mixture bakes, tiny pockets can rise and create blemishes. Gently pop them with the tip of a small knife.

Understanding the chemistry allows you to control the process. The dessert will rise and then fall during baking. This movement is normal and contributes to the final, luxurious texture.
| Factor | Ideal Practice | Purpose | Visual Indicator |
|---|---|---|---|
| Oven Temperature | 220°C / 425°F | Promotes rapid browning | Deep golden brown top |
| Surface Handling | Pop bubbles with a knife | Ensures a blemish-free finish | Smooth, crackled crust |
| Baking Process | Allow natural rise and fall | Develops proper texture | Center sets while surface darkens |
Baking techniques and oven settings
Your dessert’s transformation in the heat relies on precise temperature control from the start. Getting your oven settings correct ensures that iconic contrast between a dark top and creamy center.
Preheating and temperature guidelines
You must preheat your oven to 220°C (425°F) before placing your pan inside. This intense initial heat is non negotiable for proper caramelization. It causes the surface to brown rapidly.
Always position your pan on the middle rack. This simple step promotes even heat distribution. It prevents the bottom from cooking too quickly.
Managing the temperature effectively is your key to success. The high setting creates the environment needed for that signature look.
Managing variable baking times
Your total baking time will likely fall between 45 and 65 minutes. This wide range is completely normal. Different oven brands can have slight calibration differences.
Instead of watching the clock, watch the color. During the final 15 minutes, keep a close eye on the top. You want a rich, golden brown hue.
The internal doneness remains consistent even as the time varies. Perfecting your baking technique gives you that ideal balance every time.
Achieving that perfectly caramelized top
The hallmark of this dessert is its beautifully dark top, and you can master it by focusing on two key steps. Proper preparation of your parchment and pan is essential. These methods ensure a stunning contrast between the crust and the creamy interior.
Scrunching the parchment for rustic sides
Your parchment does more than just line the pan. Crumple the parchment paper into a ball first, then smooth it out. This creates natural folds that fit snugly into the corners.
These folds shape the sides of your dessert, giving them that signature rustic look. This technique with the parchment creates those iconic, uneven sides. The paper also acts as a shield. It prevents the edges from drying out while the surface caramelizes.

Strategies for Reducing Air Bubbles
After pouring your batter into the prepared pan, don’t bake it just yet. Lift the pan a few inches off your counter. Gently drop it down three to five times.
This banging motion forces trapped air pockets to rise in the batter. You can then pop them with the tip of a knife. This simple trick keeps the top smooth and blemish-free.
A smooth surface allows for even browning. Your final creation will have that perfect, crackled finish everyone loves.
Serving and Presentation Tips
Serving this dessert is where its rustic charm can truly shine. A few thoughtful touches can transform your homemade creation into a stunning centerpiece for any table.
Optimal slicing and plate presentation
For clean, professional slices, your knife technique matters. Wipe the blade clean with a damp cloth between each cut. You can also dip it in warm water first.
This simple step ensures every piece has a smooth face, showcasing the beautiful contrast between the dark top and pale interior.
When it’s time to serve, you have charming options:
- For Authentic Style: Place the entire cake on its crumpled parchment paper. This highlights the dessert’s rustic, artisanal origins perfectly.
- For a Formal Look: Carefully peel the paper away and transfer the cake to a elegant platter. The sides will be firm enough to hold their shape after chilling.
Remember, this treat is a masterpiece on its own. The rich, creamy flavor and caramelized crust are so perfect that extra toppings are completely unnecessary.
Cooling, chilling, and storage considerations
The final, crucial phase of your baking journey happens outside the oven. How you handle your creation during this time determines its ultimate texture and flavor.
Allowing the cheesecake to set properly
You must let your dessert rest at cool room temperature for a full two hours. This is not just waiting; it’s an active part of the process. During this period, the center will naturally collapse and settle into its final, creamy form.
After this initial rest, move it to the refrigerator. Leave it uncovered for at least eight hours, or preferably overnight. Keeping it uncovered is vital. It prevents condensation from forming and dripping onto that beautiful bronzed top.
This extended chilling time is what locks in the signature, mousse-like consistency. The texture becomes perfectly set and luxurious.
Your finished treat will keep wonderfully in the fridge. Leftover portions stay fresh for up to five days. Many find the flavor deepens and improves significantly by the second day.
Following these simple steps for cool room temperature rest and proper chilling ensures every slice is a masterpiece. It’s the secret to that celebrated, cloud like texture for any special occasion.
Troubleshooting common pitfalls
Let’s tackle the most frequent issues bakers face to ensure your creation turns out flawless every time. A smooth process protects that iconic texture and beautiful look.
Avoiding overmixing and overbaking
You must handle your batter with a gentle touch. Overmixing incorporates too much air. This leads to unsightly bubbles on the surface of your cheesecake.
Stop beating the moment the eggs are fully blended in. This preserves the delicate, mousse-like consistency.
Using the correct amount of flour is non-negotiable. Adding even a little extra can make the filling dry. Stick to the minimum to keep it wonderfully light.
Proper prep makes a huge difference. Your cream cheese should be perfectly soft. Your cream needs to be at room temperature.
This helps everything emulsify smoothly, preventing lumps. Watch your oven during the final minutes. If the top darkens too fast, simply lower the rack.
| Common Issue | Primary Cause | Simple Solution | Desired Result |
|---|---|---|---|
| Surface Bubbles | Overmixing the batter | Mix only until just combined | Smooth, crackled top |
| Dry Texture | Excess flour in the mix | Measure flour by weight | Creamy, mousse like center |
| Lumpy Batter | Cold cream cheese or cream | Use room-temperature ingredients | Silky, homogeneous mixture |
| Overly Dark Crust | Oven too hot or rack too high | Monitor color and adjust rack | Perfectly caramelized finish |
Don’t miss our tiramisu lotus biscoff,Try our mochi ice cream recipe and mini bundt cake recipes.
Conclusion
Your baking adventure culminates in a creation that balances rustic charm with luxurious flavor. Mastering this method requires careful attention, from weighing your eggs to selecting premium vanilla for the best taste.
Whether you use a stand mixer or a handheld beater, combine ingredients gently. This preserves the airy, mousse-like texture that makes every bite so special.
We hope this guide helps you craft a dessert you’ll want to bake more than one time. Sharing it with friends and family turns your effort into a memorable experience.
Remember, the unique appeal lies in that beautifully caramelized top and creamy center. Enjoy your homemade masterpiece, knowing you’ve achieved an authentic and delicious result.
Your email will not be published publicly.