
Top 1 the best carrot cake with brown butter frosting
Remember that last spring potluck? You brought a store-bought pie, but it was your aunt’s homemade dessert that stole the show. The whole room went quiet after the first bite. That’s the magic we’re bringing to your kitchen today.
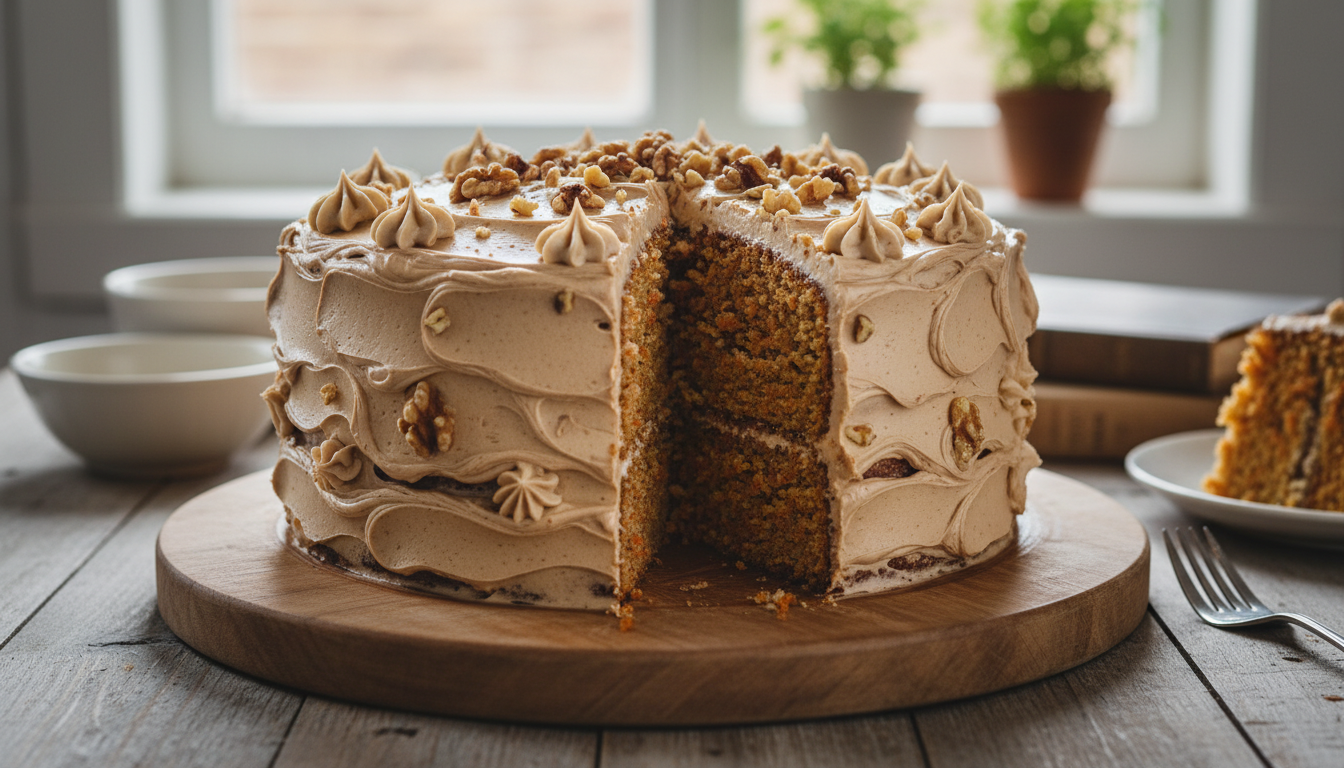
This guide shares a beloved recipe (carrot cake with brown butter frosting) designed for you. It yields ten generous servings and bakes at a perfect 350 degrees F. Your result will be a stunning, shareable treat.
We focus on high-quality ingredients to guarantee a moist crumb and tender texture that lasts for days. Warm spices blend with a uniquely rich, nutty frosting for a flavor that feels both classic and new.
This isn’t just any dessert. It’s a bakery quality masterpiece you can proudly create. It’s the ultimate centerpiece for your next holiday or family gathering.
Introduction to Your Decadent Carrot Cake Adventure
Let’s explore what sets this spiced creation apart from ordinary baked goods. You are beginning a simple journey to a standout dessert. This recipe is crafted for success, whether you’re new to baking or a seasoned pro.
Discover the moist, spiced treat you’ll create
Your goal is a dessert with a wonderfully moist crumb and warm, aromatic spices. Each slice promises a tender, delicate texture that holds up beautifully. As noted by baker Tessa Arias, this carrot cake stays perfectly fresh for days.
What makes this cake special
Many versions can turn out overly oily or disappointingly dense. Through careful testing, Tessa Arias helped refine this formula to avoid those common flaws. The secret lies in a balanced blend of spices and a clever twist.
Brown butter is introduced to the batter, adding a rich, nutty depth to the classic flavor profile. We insist on fresh, quality ingredients for the very best result. Your finished carrot cake will be a treat your guests remember.
Ingredient Breakdown and Preparation Essentials
The foundation of any great baked good lies in the careful selection and preparation of its parts. Your success hinges on using the right ingredients and handling them correctly. Let’s break down what you’ll need and how to get ready.
Dry ingredients and spice blend
Your dry mix provides the necessary structure. You will use two and a half cups of all-purpose flour. Add one teaspoon of baking soda for lift.
For warmth and depth, blend your spices. Use one teaspoon of ground cinnamon. Include half a teaspoon each of ground nutmeg and ginger.
Do not forget half a teaspoon of fine sea salt. It balances the sweetness perfectly. Always measure your flour by spooning it into the cup and leveling it off. This prevents a dense result.
Fresh produce and preparation tips
Fresh carrots are non negotiable for a moist crumb. You need three cups of freshly grated carrots. Use the medium holes on your grater.
Store-bought, pre shredded bags are often too dry. They simply won’t deliver the same tender texture. Preparing your own makes a world of difference.
Finally, ensure all your ingredients are at room temperature before mixing. This guarantees a smooth, consistent batter that bakes evenly every time.
Step by Step Method for the Perfect Carrot Cake
The magic of this dessert comes alive during the mixing and baking process. Each step builds toward a tender, flavorful result.
Mixing techniques for optimal texture
Begin by whisking your dry ingredients in a large bowl. In another, combine the wet mixture. Use oil, brown sugar, and three large eggs.
Gently fold the dry mix into the wet ingredients. Avoid overmixing. This is crucial for a light, tender crumb.
Baking time and temperature guidelines
Preheat your oven to 350°F. Prepare two 8-inch pans with parchment paper. This ensures easy removal later.
Divide the batter evenly between them. Your baking time will be 30 to 40 minutes. Start checking at the 30-minute mark.
| Pan Type | Oven Temperature | Baking Time | Doneness Test |
|---|---|---|---|
| Two 8-inch rounds | 350°F | 30-40 minutes | Skewer comes out clean |
| Two 9-inch rounds | 350°F | 25-35 minutes | Center springs back |
| 12-cup muffin pan | 350°F | 18-22 minutes | Toothpick clean |
Let the layers cool in the pan for 20 minutes. Then transfer them to a wire rack to cool completely.
How to Make Carrot Cake with Brown Butter Frosting
The crowning glory of any great dessert is its finishing touch, and here we master a truly special one. This frosting combines rich, nutty depth with a luxuriously creamy texture.

- 9 Inch Cheesecake Pan, Leakproof 304 Stainless Steel Springform Pan with Silicone Protector for Water Bath Baking 👉 CILCK HERE
- Don’t miss our hummingbird cake recipe, no bake cheesecake condensed milk and strawberry icebox cake.
Browning the butter for that nutty flavor
Start your brown butter by melting it in a saucepan over medium heat. Cook it for five to eight minutes. You must watch the bottom of the pan closely.
The milk solids will turn a deep amber color and release a wonderfully nutty aroma. Once achieved, immediately remove it from the stove. Chill the butter until it reaches a soft, spreadable consistency.
Achieving the perfect creamy consistency
For the base, you need twenty-four ounces of full-fat cream cheese. Ensure both the cream cheese and your browned butter are at room temperature. Use a stand mixer for the best results.
Beat them together until the mixture is light and fluffy. Add a touch of confectioners’ sugar and pure vanilla extract for aroma. This cream cheese frosting is stable and doesn’t require constant chilling.
Finally, use an offset spatula to spread it generously between your cooled layers. Create beautiful swirls on top for a professional, festive look.
Baking Techniques and Equipment Essentials
Your success hinges not just on the recipe, but on the gear you use. Proper tools guarantee even cooking, perfect texture, and a beautiful final presentation.
Choosing the right pan for your recipe
Selecting the correct pan is a foundational step. For this specific formula, two 8-inch rounds are ideal. Always opt for light-colored metal pans.
They reflect heat better than dark pans. This prevents the edges from burning before the center is fully set.
A stand mixer or powerful hand mixer is essential for your cream cheese frosting. It incorporates air for a luxuriously fluffy texture. Never skip lining your pan with parchment paper.
This simple step ensures your cake releases perfectly. For a stunning layered look, a serrated knife helps split cooled rounds evenly.
Keep a clean spatula nearby to scrape the bowl thoroughly. Accurate measuring cups are your best friends for a consistent, delicious result every time you bake.
Tips for Achieving a Moist and Tender Texture
Your path to a flawlessly tender result involves smart ingredient swaps and gentle handling. Mastering these techniques ensures a soft crumb that stays fresh for days.

Using buttermilk and alternative substitutes
Buttermilk adds a lovely tang and promotes a delicate crumb. If you don’t have any, create a substitute. Mix one cup of milk with one tablespoon of lemon juice.
Let it sit for five minutes before using. For a different approach, you can swap one cup of oil for applesauce. This keeps your dessert wonderfully moist.
Creaming and folding methods explained
Always start with ingredients at room temperature. Your eggs and butter will emulsify much better this way. This creates a stable, airy batter for a light texture.
When adding your grated carrots, fold them in gently. Overmixing deflates the batter. A pinch of salt in your flour blend perfectly balances all the sweetness.
| Ingredient | Primary Benefit | Best Used For | Notes |
|---|---|---|---|
| Buttermilk | Adds tang, tenderizes crumb | Classic flavor profile | DIY substitute is easy |
| Applesauce | Natural sweetness, moisture | Reducing fat content | Use unsweetened |
| Oil & Brown Butter Combo | Ensures long-lasting softness | Rich, nutty depth | Keeps dessert tender for days |
| Sour Cream | Extra richness and moisture | Ultra-decadent versions | Use full-fat for best results |
The right combination guarantees your creation remains soft and delightful.
Flavor Enhancements and Nutty Accents
Elevating your baked creation from good to unforgettable often lies in the details. Thoughtful add-ins provide essential texture and depth, transforming a simple spiced dessert into a complex masterpiece.
Incorporating walnuts and optional mix ins
For a rich, nutty dimension, toast three-quarters of a cup of chopped walnuts in a dry skillet. Just five minutes of toasting unlocks a deeper flavor and provides the perfect crunchy contrast.
If allergies are a concern, you can create a nut-free version. Simply replace the walnuts with an equal amount of all-purpose flour. This swap maintains the ideal structure.
The warmth of your spices is crucial. Always use fresh ground cinnamon for maximum aromatic impact. You can also experiment by adding a touch of ground ginger for a subtle, warm kick.
Some bakers enjoy adding raisins or other dried fruits. For the best distribution, always fold your nuts or any mix-ins in at the very end. This ensures every bite is perfectly balanced.
The crunch pairs wonderfully with your creamy cheese frosting. A rich cream cheese frosting clinging to toasted nuts creates an incredible taste experience.
Recipe Variations and Pan Alternatives
One of the joys of this classic recipe is its incredible flexibility. You are not locked into one specific presentation. This spiced dessert adapts beautifully to different pans and serving styles.

Mini cakes, sheet cakes, and cupcake options
For individual portions, turn this formula into cupcakes. They bake much faster, typically needing just 18 to 22 minutes. A standard muffin pan works perfectly for this.
Prefer a simple sheet cake? Use a 9×13-inch pan. You will need to adjust your baking time slightly. Always check that the center is fully cooked before removing it from the oven.
Creating mini layered desserts is another fun option. Use smaller pans and start checking for doneness around the 20-minute mark. This prevents the edges from drying out.
The frosting is versatile, too. While the brown butter cream cheese frosting is highly recommended, you can swap it. A classic cream cheese frosting also pairs wonderfully.
You can easily double this recipe for a large gathering. Just ensure you have enough mixing bowls and pans ready. The key rule is simple: changing the pan size always affects the baking minutes. Keep a close eye on your oven for the best results every time.
Storage, Make Ahead Strategies, and Serving Suggestions
Your beautiful dessert deserves proper care to stay fresh and impressive. Smart planning lets you enjoy it over several days or prepare it well ahead of a special event.
Best practices for refrigeration and freezing
You can store your frosted cake in the refrigerator for up to three days. Wrap it loosely to maintain its perfect moisture.
For long-term storage, freeze the unfrosted layers. They will keep well for up to two months. Thaw them overnight when you are ready to assemble.
Your creation can sit out safely for up to six hours. After that, please refrigerate it again.
Presentation tips for a festive look
Transform your dessert into a centerpiece with a few simple tricks. Use a piping bag to add elegant swirls of cream cheese frosting on top.
If it has been chilled, let it sit at room temperature for a short time before serving. This softens the frosting for the best texture.
Always use a sharp knife for slicing. Wipe the blade clean between cuts for neat, beautiful portions every single time.
| Storage Method | Max Time | Key Tip | Best For |
|---|---|---|---|
| Refrigeration | 3 days | Wrap loosely with plastic | Frosted dessert |
| Freezing | 2 months | Thaw layers overnight | Make-ahead planning |
| Room Temperature | 6 hours | Ideal for serving | Parties & gatherings |
Conclusion
Your baking journey culminates in a dessert that’s both a personal triumph and a crowd-pleaser. You have now mastered the art of creating a moist, flavorful spiced treat.
By following these steps, you learned to properly brown butter and use fresh ingredients. The key to a perfect result lies in quality ingredients and careful mixing for the ideal texture and flavor.
This recipe is sure to become a staple for holidays or weekend treats. Enjoy sharing this delicious dessert. Feel free to experiment with mix-ins to make the classic formula your own.
Your email will not be published publicly.