
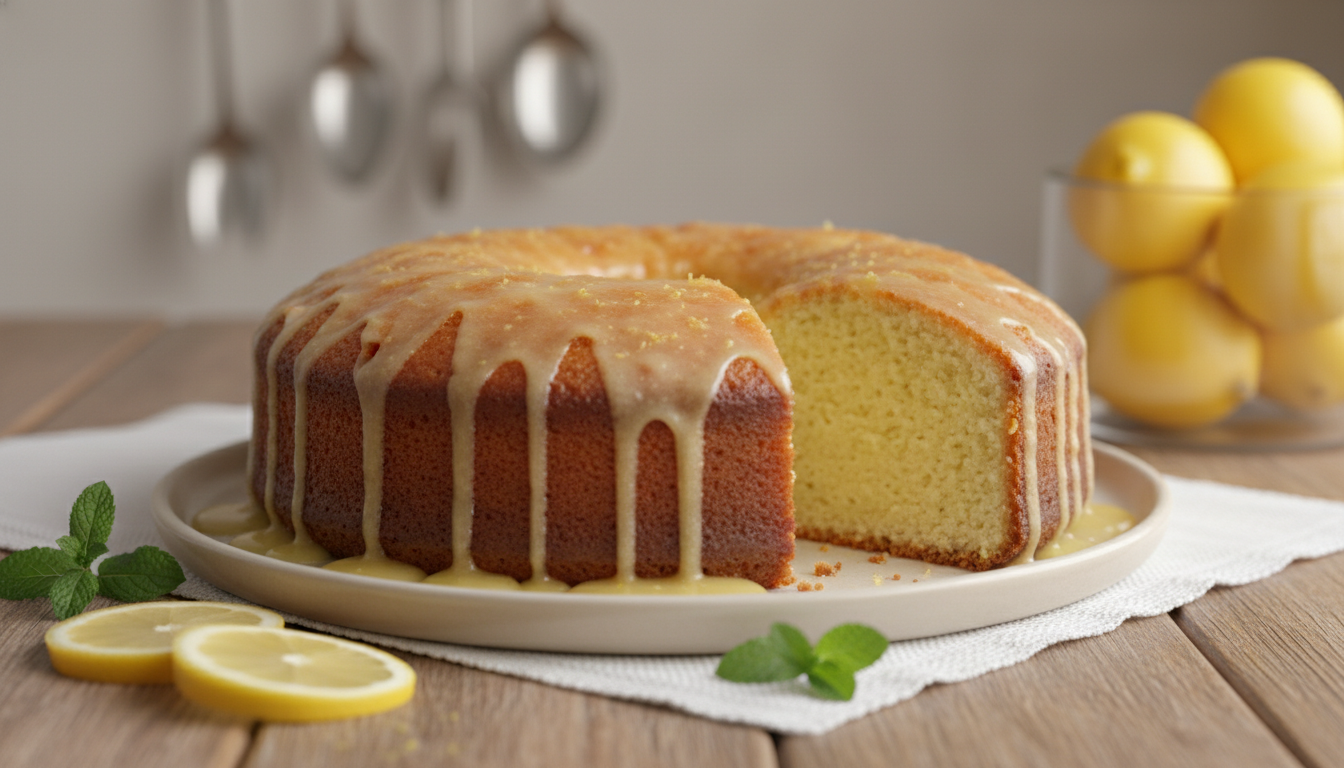
Gluten free lemon drizzle cake: Moist and delicious
Remember the last time you craved a bright, citrusy dessert but hesitated because of dietary needs? I was at a friend’s gathering, eyeing the treat table, wishing for something I could enjoy without worry.
That experience inspired me to create a recipe that everyone can love. This particular dessert is a game changer. It proves that you don’t need complex steps or strange ingredients to bake something incredible.
You will love how just seven simple items come together to form a perfectly moist treat. The secret lies in using ground almonds. They give a soft texture that stays fresh for days.
This creation is naturally suited for those following specific eating plans, like a low FODMAP diet. It’s an inclusive option for any special occasion. The vibrant, zesty profile comes from fresh citrus juice and zest.(Gluten free lemon drizzle cake)
You can finish it with a classic demerara sugar crunch or a sweet glaze. Either way, the result is a crowd pleaser. One loaf yields about ten satisfying slices.
Proper storage in an airtight container keeps it fresh for nearly a week. Whether you’re a beginner or a seasoned baker, this method is straightforward. Your kitchen will smell amazing, and your guests will be impressed.
Welcome and Recipe Overview
You have two fantastic options to crown your zesty almond based loaf. This choice is the best part of the recipe. It lets you customize the final taste and look.
The classic method uses demerara sugar. It creates a lovely crystalized crunch on top. This way is quicker and needs less clean-up.
For a more modern look, try the sweet glaze. It adds a sharp zing and a professional finish. This option takes about five extra minutes to mix.
Your personal preference or the occasion can guide your pick. Both finishes balance sour citrus and sweet sugar perfectly. The table below highlights the key differences.
| Feature | Classic Drizzle Finish | Lemon Icing Finish |
|---|---|---|
| Texture | Crispy, crystalized crunch | Smooth, glazed surface |
| Prep Time | Very quick | Adds 5 minutes |
| Visual Appeal | Rustic, homestyle | Elegant, professional |
| Sweetness | Less sweet, more texture | Sweet and zingy |
| Best For | Quick snacks, less washing | Special gatherings, wow factor |
You really can’t go wrong. The entire process is designed for simplicity. You will spend less time in the kitchen and more time enjoying your dessert.
Whether you pick the crunchy classic or the glossy glaze, your guests will be impressed. This versatile recipe ensures a delicious result every single time.
Ingredients & Essential Tools
Before you preheat the oven, let’s talk about what you’ll need on your counter. Having the right items ensures your bake is a success from the start.
This recipe uses just seven simple components. Each one plays a specific role in creating that perfect, tender crumb.
Key Ingredients for Moist Texture
The secret to a soft, moist texture is 100g of ground almonds. They add richness without a strong nutty taste.
Fresh citrus juice and zest provide the signature zing. Your butter and eggs should be at room temperature for easy mixing.
Baking powder and a little xanthan gum help the loaf rise and hold its shape beautifully.

| Ingredient | Key Quantity | Primary Role |
|---|---|---|
| Ground Almonds | 100g | Creates a moist, tender crumb |
| Fresh Lemon Juice & Zest | From 2 lemons | Delivers bright, tangy flavor |
| Baking Powder & Xanthan Gum | 1 tsp each | Ensures proper rise and structure |
| Butter & Sugar | Equal parts | Forms the base for a light batter |
| Eggs | 3 large | Binds ingredients and adds richness |
- Chicago Metallic Angel Food Cake Pan : 9.5″ nonstick tube pan with cooling feet. Even baking, easy release, dishwasher safe. Perfect for angel food, pound, or sponge cakes: SHOP NOW
- Don’t miss our burnt basque cheesecake recipe,Try our mochi ice cream recipe and strawberry icebox cake.
Recommended Baking Equipment
You need a high quality 2lb loaf tin. This size guarantees even baking and a lovely shape.
An electric mixer is best for creaming butter and sugar until fluffy. A sturdy wooden spoon works if you prefer.
Accurate weighing scales are non-negotiable. They give you consistent results every single time.
Step by Step Recipe Preparation
Achieving the perfect texture starts with how you handle the wet and dry mixes. Follow this sequence for a light and fluffy result every time.
Mixing Wet and Dry Ingredients
Begin with your creamed butter and sugar. Add your eggs one at a time, beating thoroughly after each. This builds a stable, airy foundation.
Now, gently fold in the special flour blend and ground almonds. Use a spatula and a light hand. This preserves all the air you just created.
Your final batter should be smooth and thick. It’s ready for the oven.
Baking Instructions and Timings
First, preheat your appliance to 160°C Fan or 180°C. Pour the batter into your prepared loaf pan.
Bake for 45 to 50 minutes. Watch for a lovely golden-brown color on top. To test, insert a skewer into the center. It should come out clean.
As soon as the dessert is out, poke holes all over the surface. This lets the zingy syrup soak in deeply. Let it cool completely in the pan before you try to remove it.
Baking Tips and Techniques
The difference between a decent bake and an outstanding one often lies in the details. These insights help you perfect the texture and flavor of your dessert every single time.
Optimizing Moistness with Ground Almonds
Ground almonds are your secret weapon for a rich, tender crumb. They add necessary fat that helps your creation stay fresh longer without a strong nutty taste.
According to Monash University, a safe low FODMAP portion is 12g of almonds. One slice of this treat contains about 7.5g, making it a friendly choice.

Never be tempted to cut the sugar. It’s crucial for the dessert’s structure and perfectly balances the citrus’s sharpness. Also, always use a high-quality, all-purpose flour blend for the best crumb.
| Technique | Purpose | Key Detail |
|---|---|---|
| Using Ground Almonds | Creates a moist, tender texture | Helps retain moisture for days; use 100g. |
| Not Reducing Sugar | Ensures proper structure & balance | Essential for volume and to offset sour juice. |
| Quality Flour Blend | Provides the right crumb and rise | Avoid single flours; use a trusted brand. |
| Pouring Drizzle Gradually | Allows even absorption for super-moist bites | Poke holes in the hot loaf first. |
| Using the Correct Pan | Promotes even heat distribution | A 2lb loaf tin is ideal for perfect baking. |
Following these methods ensures every bite is perfectly infused. Your final product will remain delicious for days.
Mastering the gluten free lemon drizzle cake
The true art of this dessert lies in the delicate balance of sweet syrup and tangy glaze. Mastering these final steps ensures a professional result that wows everyone.
Perfecting the Drizzle and Icing Finish
Create the signature soak while your loaf is still warm from the oven. Combine fresh citrus zest and juice with granulated sugar. Pour it slowly over the top, letting it seep deep into every bite.
For a sleek, glossy finish, make a simple icing. Mix confectioners’ sugar with a little citrus juice until smooth. You can add extra zest on top for a vibrant look.
Controlling Oven Temperature and Baking Time
A steady oven heat is crucial for a proper rise. Even a small fluctuation can affect the texture. Preheat your appliance thoroughly and avoid opening the door too soon.
The bake time is a guide, not a rule. Always use the skewer test for doneness. Insert it into the center; it should come out clean.
Using a stand or hand mixer helps achieve a light, fluffy batter. This step incorporates air for a superior crumb. Your attention here makes the process deeply rewarding.
Customizing Your Recipe & Substitutions
One of the best parts of this recipe is how easily you can adapt it to different diets. You can make simple swaps to accommodate allergies or lifestyle choices without sacrificing flavor.

Dairy Free and Vegan Options
For a dairy-free version, simply replace the butter with a hard margarine like Stork. This swap works perfectly for the batter.
To make the entire dessert vegan, you’ll need an egg substitute. Three tablespoons of aquafaba or a commercial egg replacement powder for each egg works well. These options help bind your ingredients just like traditional eggs.
Nut Free and Gluten Free Flour Alternatives
If nuts are a concern, swap the ground almonds for an equal amount of gluten-free self-raising flour. This creates a safe and delicious treat.
Always check that your chosen flour blend contains xanthan gum. This component is vital for the dessert’s structure. For those with celiac disease, ensure every ingredient is certified to avoid cross-contamination.
Remember to keep your oven temperature steady. This ensures your customized loaf bakes through properly every time.
Troubleshooting & Storage Solutions
Let’s tackle common issues and the best ways to keep your dessert tasting great from the first slice to the last.
A few simple fixes can save your bake. Proper storage keeps it moist for days.
Common Baking Challenges
If your skewer comes out with moist crumbs, just bake for a few more minutes. This is a quick fix for an underdone center.
A sunken middle often means your batter wasn’t mixed consistently. Using a reliable mixer helps prevent this.
Is the top browning too fast? Loosely cover it with foil for the remaining bake time.
Always let your creation cool completely before adding any icing. This stops it from melting into the sponge.
Proper Storage, Freezing, and Shelf Life
Keep your baked good fresh by storing it in an airtight container at room temperature. It will stay delicious for 3 to 5 days.
For longer keeping, freeze it. Slice it first for easy portioning. It will keep for up to a month.
Defrost a single slice at room temperature for 4 to 5 hours. This is much faster than thawing the whole loaf.
| Storage Method | Duration | Key Tip |
|---|---|---|
| Airtight Container (Room Temp) | 3-5 days | Preserves moisture from the ground almonds and citrus juice. |
| Freezer (Sliced) | Up to 1 month | Wrap slices individually for quick, single-serving thawing. |
| Defrosting | 4-5 hours per slice | Leave at room temperature; no microwave needed. |
Following these steps ensures every piece is as perfect as the first.
Conclusion
Your journey to a perfect, zesty dessert is now complete. You have learned to create a moist treat using just seven simple items.
Whether you picked the classic crunchy crown or a smooth, sweet lemon icing, your result is sure to delight. Remember, using high quality gluten free flour and fresh lemon juice makes all the difference.
Following the correct oven temperature and bake time ensures a perfectly cooked, zesty loaf every time. We hope you enjoy sharing this delicious bake with loved ones.
Don’t forget to share your photos online. Tag us so we can celebrate your beautiful creation!
Thank you for baking along. We look forward to your next kitchen adventure.
Your email will not be published publicly.