
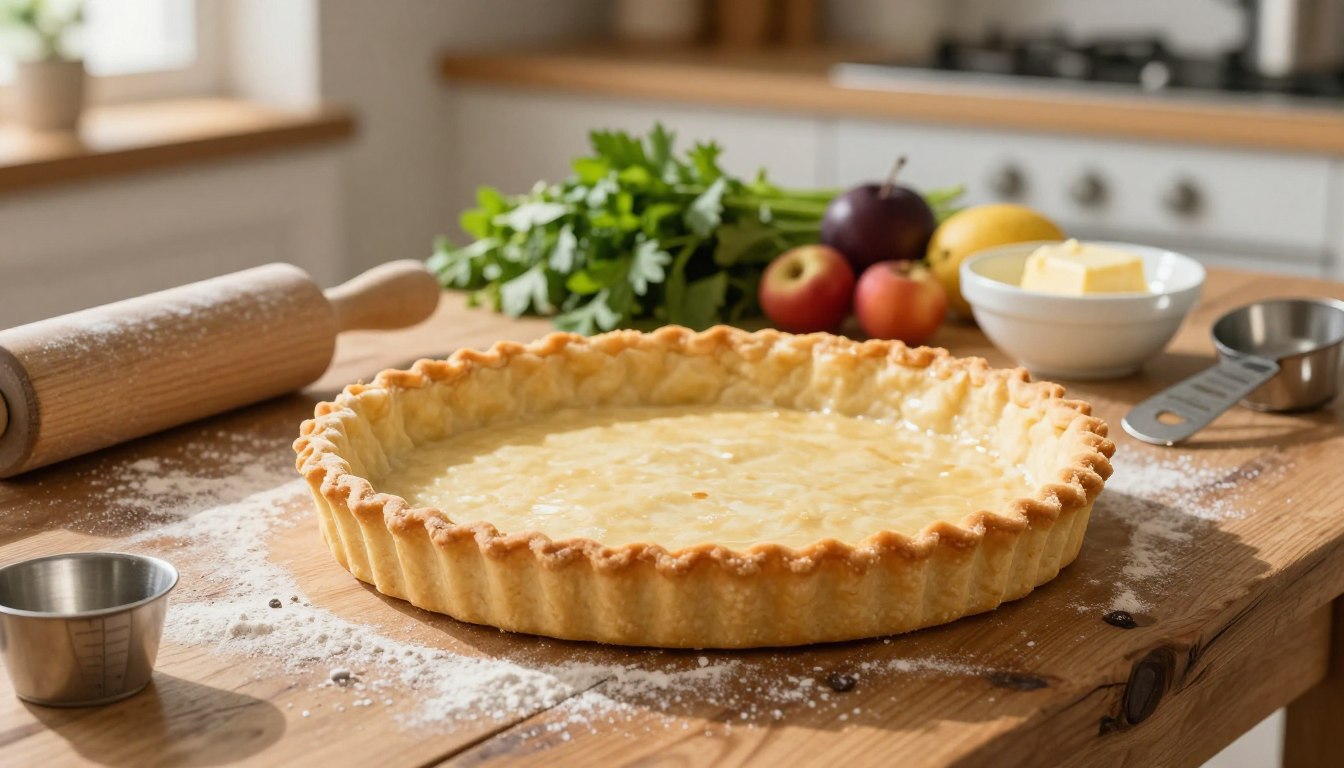
Delicious Homemade Tart Shell Recipe in 30 Minutes
When you first pull a golden, buttery crust from the oven, it feels like a small victory. I remember the time you nervously slid a simple Pâte Sablée into a hot oven, hoping it would hold its shape. That little win changed how you approached baking.
This method earned over 100 five star reviews because it delivers a crisp, cookie-like crust in just 30 minutes of active time. You use high-fat European butter, quality flour, and clear steps to keep the dough light and easy to handle.
In this guide, you’ll learn practical tips to prevent shrinkage, manage temperature, and finish a professional tart crust without fuss. Whether you bake for holidays or a quiet weekend, these recipes streamline your time and boost confidence.
Ready to master a reliable, buttery base? Follow along and you’ll see how small adjustments in technique and ingredients make a big difference in your baking results.
Why You Will Love This Tart Shell Recipe
You’ll find that humble ingredients combine to make a crisp, buttery base that looks and tastes professional.
Consistent results. Home bakers like Miss Glitteryone praise the clear steps that deliver perfect shells every time. That reliability makes the dough easy to trust for busy afternoons or special occasions.
Friendly for beginners. Emer and many readers say this is the only recipe they need to finally feel confident. The method explains each step so you can follow along without guesswork.
Versatile and elegant. This crust pairs with sweet or tart fillings and adapts to mini tarts or full-size presentations. You’ll be able to experiment with flavors and still get professional-looking results.
- Transforms pantry staples into a refined dessert base.
- Crisp, buttery texture that complements many fillings.
- User-friendly approach that supports repeatable success.
Essential Equipment for Professional Results
Professional results start with equipment that controls airflow, heat, and surface grip.
Choosing the Right Rings
Perforated tart rings are worth the investment. They let air circulate so your crust browns evenly and stays crisp.
Place rings directly on the oven rack for best airflow. If you use a standard pie pan, pick one with a removable bottom to avoid damage when unmolding.

Using Silicone Baking Mats
Silicone mats beat parchment paper for heat distribution and non-stick performance. You can roll dough to a precise 2mm thickness without adding extra flour.
A digital thermometer helps you verify oven temperature and avoid under- or over-baking. Proper tools stop the common problem of the crust shrinking away from the sides.
- Perforated rings = even air flow, crisper edges
- Silicone mats = stable surface, less flour needed
- Removable bottoms = easy unmolding for delicate tarts
| Tool | Benefit | Tip |
|---|---|---|
| Perforated rings | Even browning and crisp edges | Place directly on oven rack |
| Silicone baking mat | Non-stick, precise rolling | Skip extra dusting flour |
| Removable-bottom pan | Safe unmolding | Use for fragile fillings |
| Digital thermometer | Accurate oven control | Check before baking |
Selecting the Best Ingredients for Your Crust
Choose ingredients that build flavor and texture, and your crust will reward you every time.
Use unsalted European-style butter with at least 82% fat. That higher fat gives a richer mouthfeel and better flake in your dough.
Swap granulated sugar for powdered sugar to get a finer, more tender bite. A pinch of salt balances sweetness so the final crust tastes rounded, not cloying.
- Weigh ingredients: A digital scale prevents adding extra cups of flour that stiffen the dough.
- Room temperature egg: It mixes smoothly and stops the butter from seizing.
- Flour choice: Pastry flour is ideal for low protein, but all-purpose flour works well if that’s what you have.
- Optional: Almond flour adds a nutty depth; substitute equal measure only if you’re comfortable.
| Ingredient | Why it matters | Pro tip |
|---|---|---|
| Unsalted European butter (82% fat) | Rich flavor, better texture | Cold, cubed for even mixing |
| Powdered sugar | Finer crumb than granulated | Sift before measuring |
| Pastry or all-purpose flour | Controls protein for tenderness | Use pastry flour for the lightest crust |
| Pinch of salt | Balances sweetness | Always add, even to sweet dough |
Every ingredient plays a role in the chemistry of your tart crust, so avoid substitutions unless you know the effect. Follow these choices and you’ll get consistent results every time.
Mastering the Dough Preparation Technique
Start with a clear, cool method and your crust will roll, bake, and unmold with ease.
The Creaming Versus Crumbling Method
To begin, sift your dry ingredients—flour, powdered sugar, and salt—into a large bowl to remove lumps and aerate the mix.
Prefer the crumbling method. Rub cold butter into the flour with your hands until the texture resembles damp sand. This keeps the butter chilled and prevents greasy, tough results.
Avoid using a food processor for this step. The motor can warm the mixture and melt the butter, which ruins the delicate structure of the dough.
- Add the egg and bring the dough together quickly.
- Knead with the palm of your hand for only one or two minutes to avoid excess protein development.
- If the dough feels warm or sticky, chill it in the fridge for 10–15 minutes before rolling.
| Step | Why it matters | Tip |
|---|---|---|
| Sift dry ingredients | Even mix, no lumps | Use a large bowl for easy blending |
| Crumble cold butter | Maintains flakiness | Work quickly with cool hands |
| Short knead | Limits gluten, keeps tender crust | One or two minutes is enough |

- 11 & 9 inch tart pans + 2 mini pans. Removable bottom, non stick, carbon steel. Perfect for quiche & pie.
- Don’t miss our hummingbird cake recipe,Try our earl grey lavender cake and strawberry icebox cake.
Rolling and Shaping Your Tart Shells
Start by flattening your chilled dough between two silicone mats so you get an even, professional surface.
Roll to 2mm thickness, rotating the dough 90 degrees after each pass. This keeps thickness consistent and helps the crust bake evenly.
Use the base of a perforated ring to cut circles. Then place dough into the ring and press strips into the sides to build walls.
- Roll between silicone mats or parchment paper to skip extra flour and keep the pastry clean.
- Aim for 2mm across the whole surface so all tarts finish at the same time in the oven.
- Press bottom and sides firmly with your hands to remove air pockets that cause puffing.
- Trim the top edges flush with a sharp knife so the rim looks sharp and even.
- If the dough softens, return it to the freezer for 5 minutes to firm up before finishing.
Chill once shaped. A final chill keeps the crust from shrinking when it hits baking heat and helps you get a seamless, sturdy tart crust every time.
The Importance of Temperature Control
Keeping things cool is the single best trick to stop your dough from going soft. Temperature affects every stage of baking. If your kitchen runs warm, you may need to chill the dough several times so it stays workable.

Why Chilling Is Critical
Cold butter creates pockets of fat that steam in the oven and make flake and lift. If the butter melts too soon, the crust loses shape and becomes dense.
Chill in short bursts. In a hot kitchen, you might chill the dough up to 10 times between steps. Even a few extra minutes in the freezer can make a big difference.
Managing Kitchen Temperature
Always preheat your oven to 160°C (320°F) and avoid fan settings. A stable oven heat helps the pastry bake evenly without melting the butter too quickly.
Before you preheat oven, ensure the dough has had enough time to firm up. That guarantees a crisp finish and makes it easier to place dough into rings without tearing.
- Keep your workspace cool and handle the dough as little as possible to protect the fat.
- If the dough feels sticky, chill it for a few minutes rather than adding more flour.
- Monitor time closely: short chills preserve structure better than long, uncontrolled waits.
Understanding Blind Baking and Perforated Rings
Perforated rings help air reach every inch of your pastry so the base and sides cook evenly.
Modern perforated rings replace old blind baking with weights. The holes let hot air circulate right against the dough. That circulation bakes the bottom and the edges without the heaviness of beans or pie weights.
When you preheat oven, place rings on a baking mat for full airflow. Bake the shells for 20 minutes at 160°C (320°F).
After those 20 minutes the pastry will contract slightly. Remove the rings gently, then bake an extra 5–10 minutes until the crust is deep golden and crisp. This extra bake minutes finish cooking the flour and sugar so the crust won’t taste raw.
If you must line with parchment paper, trim it neat so it does not block browning at the top or edges. Let the tarts cool completely on the perforated mat before filling.
| Technique | Why it matters | Best practice |
|---|---|---|
| Perforated rings | Even air flow, no weights | Bake 20 min, remove rings, bake 5–10 min |
| Baking mat | Maximizes circulation | Place rings directly on mat when preheating |
| Parchment paper | Use only if needed | Trim to avoid shielding edges |
Common Mistakes and How to Fix Them
A few simple checks before you bake will stop common faults like puffing or dough that pulls away.
Preventing Shrinkage and Puffing
Over kneading develops too much gluten. That makes the dough elastic and likely to recoil when heated. Work quickly and knead only a minute or two.
If the dough feels warm, it will stick to your hands and the bowl. Chill it for a few minutes before you roll or press dough into the ring.
- Avoid a hot food processor; its motor can melt butter and ruin the crust.
- Prick the base with a fork to prevent puffing and let steam escape during baking.
- Use perforated equipment and bake the shell until edges are set, then remove rings and finish browning.
If edges shrink, gently press the warm pastry back into place before it cools completely. Too much water also makes sticky dough—add a cold tablespoon at a time.
| Problem | Cause | Quick Fix |
|---|---|---|
| Shrinking edges | Overworked dough | Chill 10 minutes; press edges while warm |
| Base puffs | No ventilation | Prick base; use perforated ring |
| Sticky surface | Warm butter or excess water | Return to fridge; add flour sparingly |
Creative Flavor Variations for Your Tarts
Small additions to the dough can transform a classic crust into something memorable.
Nut flours are the easiest way to add depth. Swap almond flour for hazelnut or walnut flour to introduce toasty, complex notes that pair beautifully with fruit or custard fillings.
Add bright accents by grating lemon or orange zest into the dry ingredients. The citrus oil lifts the overall flavor and helps the base complement tart or creamy fillings.
For chocolate lovers, stir Dutch-process cocoa into the dry mix. A small amount yields a rich, bittersweet base that supports intense fillings.
- Try black sesame seeds in the dough for a nutty crunch and striking appearance.
- Adjust chilling time after each addition nuts or cocoa can warm the dough and need extra refrigeration.
- Always use high quality powdered sugar to keep the texture delicate and crisp.
Timing note: Many of these tweaks add only a minute or two to prep but may add extra chill minutes to keep the dough workable. In most cases, 10–15 extra minutes in the fridge prevents spreading during baking.
| Variation | Key change | Best pairing |
|---|---|---|
| Hazelnut base | Substitute hazelnut flour for almond | Stone fruit, caramel fillings |
| Citrus zest | Add grated lemon or orange to dry mix | Lemon curd, berry fillings |
| Chocolate crust | Blend Dutch-process cocoa into flour | Chocolate ganache, cream |
| Sesame crunch | Mix in toasted black sesame seeds | Matcha or citrus fillings |
These small experiments help you build signature recipes that suit every season. Once you master the base, you can craft endless variations in just a few minutes.
Proper Storage and Freezing Methods
A little planning with freezing and refrigeration gives you a ready-made crust in minutes.
For baked tart crusts: let them cool completely on a rack before you store them. Place cooled pieces in an airtight container at room temperature and they will stay crisp for several days.
If you need longer storage, refrigerate for up to one week. Before you fill a refrigerated crust, bring it to room temperature so fillings won’t steam and soften the base.
Freezing raw dough saves time: wrap portions tightly in plastic or use freezer bags to prevent odor transfer. You can freeze unbaked cases or dough for up to three months and bake them from frozen—add a few extra bake minutes as needed.
- Divide large batches made in a food processor into single-use portions before freezing.
- Always cool baked pieces fully to avoid condensation that makes crusts soggy.
- Label bags with date and main ingredients (flour, butter, sugar) to track freshness.
| Storage | Duration | Tip |
|---|---|---|
| Room temperature, airtight | Several days | Keep away from heat and direct sun |
| Refrigerator | Up to 1 week | Bring to room temperature before filling |
| Frozen (raw cases or dough) | Up to 3 months | Wrap tightly; bake from frozen, add bake minutes |
Final note: proper storage protects texture and flavor so your hard work turns into crisp, reliable results when it’s time to serve.
Conclusion
Finish strong in just a few focused steps. Follow the method and you can complete a reliable tart shell recipe in about 30 minutes of active prep. Small habits cold butter, short kneads, and careful chilling make a big difference.
Focus on temperature and quality ingredients to keep the crust buttery, crisp, and well shaped. The tools and fixes here tackle shrinkage, puffing, and uneven browning so you bake with confidence.
With these techniques and the other recipes in this guide, you’ll be ready to make an impressive tart recipe for any occasion. Practice a few times, and soon you’ll be serving beautiful results in minutes to friends and family.
Your email will not be published publicly.