
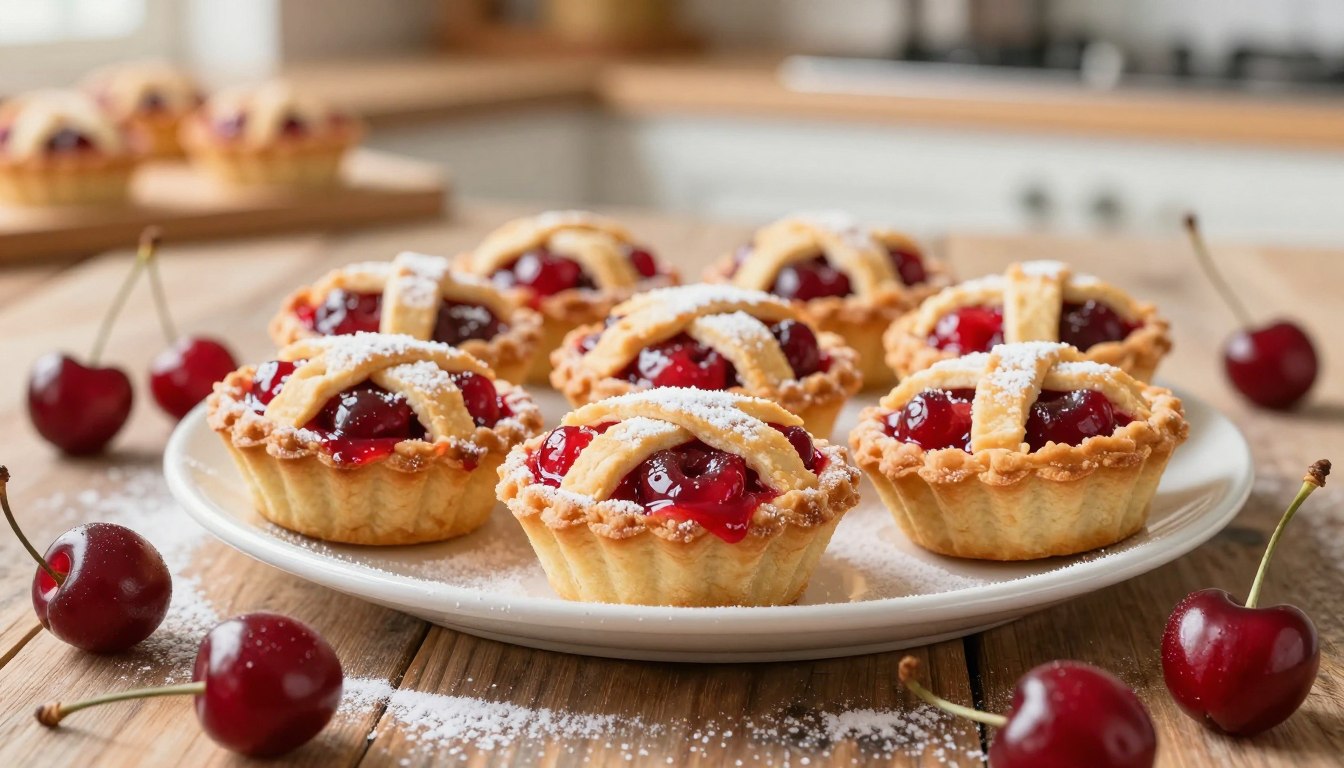
Cherry pie mini tarts: bite sized perfection
Do you have a cherished family recipe that always brings everyone to the table? Author Ginnie does. She shares that this simple formula comes straight from her mother’s well loved cookbook.
It’s the kind of treat that creates lasting memories. Her family of four could happily finish an entire pan in a single evening.
This blog post is all about capturing that magic. We’re exploring how to make the perfect little sweet for your next gathering.
Each small bite delivers a powerful wave of nostalgia. It reminds many of us of warm kitchens and cherished traditions.
These delights are ideal for a sunny get together. They are a quintessential warm weather dessert that pleases any crowd.
Best of all, they are incredibly simple to put together. Whether you’re a seasoned baker or just starting out, you can master this crowd-pleaser.
Introduction to this delicious recipe
Some recipes are more than just instructions. They’re edible memories passed down through generations.
This particular formula holds that kind of sentimental power. It connects you to warm kitchens and shared moments.
What Makes these mini tarts special?
You will find this formula unique because of its simple cream cheese crust. This sets it apart from other options.
The author explains these are essentially better versions of standard pies. They bake perfectly in muffin tins.
During the warmer months, they serve as the ideal handheld sweet. Both children and adults love them at gatherings.
The story behind this family favorite
Ginnie recalls her mother was a wonderful cook. She made these easy treats all the time for their family.
It had been years since she tasted one. Then her sister sent the cherished formula.
You can save significant time in the kitchen. Using pre made filling lets you focus on enjoying the results.
Many families have their own favorite recipes. This specific version is one her family loved for many years.
Cherry pie mini tarts essentials
The foundation of any memorable dessert lies in its core elements and preparation gear. Let’s look at what you need to gather before you start.
Key ingredients and their roles
Your signature pie crust begins with eight tablespoons of unsalted butter and three ounces of cream cheese. These fats create a rich, tender base.
Add one cup of all purpose flour and a pinch of salt. The flour provides structure, while the salt balances the flavor.
For the filling, a 20 ounce can of cherry pie filling is perfect. It saves you significant time and guarantees a delicious result every time.

- Amazon Basics Nonstick Muffin Pan, Set of 2 Sturdy, oven safe, and bakes evenly. Easy to clean, 12 cups per pan, gray. Perfect for banana bread muffins, cupcakes, and more.
- Don’t miss our Classic french dessert recipes from france you’ll love,Try our earl grey lavender cake and strawberry icebox cake.
Must have equipment and tools
A standard muffin tin is your main tool. You will divide your dough into twelve equal pieces.
Use about three tablespoons of effort to press each piece into the pan. Make sure it covers the bottom and sides fully.
High quality ingredients are essential for the best crust. You can use a store bought version if you want to simplify this recipe.
Step by step preparation and baking process
The magic happens when you combine a tender crust with a juicy filling. Follow this clear guide for flawless results every time.
Creating the perfect cream cheese crust
Start with your chilled dough. Divide it into twelve equal pieces.
Press each piece firmly into your muffin tin. Ensure it covers the bottom and sides fully.

Adding the cherry pie filling
Now, spoon in your cherry pie filling. Distribute it evenly to prevent overflow.
For a thicker, jammy consistency, mix in two tablespoons of cornstarch. A teaspoon each of lemon juice and vanilla extract boosts flavor.
Baking to golden perfection
Always preheat oven to 450°F. This high heat is key for a beautiful color.
Bake for 12 to 15 minutes. Watch the edges closely so they don’t burn.
Let your creations cool completely at room temperature. This allows the filling to set properly.
| Step | Instruction | Key tip |
|---|---|---|
| Preheat | Heat oven to 450°F | Use a dark colored pan for a deeper golden brown crust |
| Prepare Crust | Press dough into 12 tin cups | Keep ingredients cold for a flaky texture |
| Add Filling | Spoon in pie filling mixture | Use cornstarch to thicken the juices |
| Bake & Cool | Bake 12-15 min, then cool | Total prep time is about 20 minutes |
Tips and tricks for a superior outcome
The difference between a decent dessert and a standout one often lies in the details. A few simple adjustments to your method can elevate the entire experience.
These professional tips help you avoid common pitfalls. They ensure your results are consistently delicious.
Secrets for a crisp, flaky crust
Your pie crust texture depends on how you handle the fat. Roll your dough from the center outward in even strokes.
This technique keeps the butter or cream cheese in distinct layers. Those layers create that desirable flaky finish when baked.
If you use salted butter, you can skip the extra pinch of salt in your recipe. Always start with cold ingredients for the best structure.

Enhancing flavor with simple tweaks
Small additions make a big impact. A drop of almond extract complements the fruit’s natural tartness beautifully.
Let your fruit mixture rest for about ten minutes before baking. This allows the sugar and cornstarch to work together.
The result is a thicker, more jammy filling that won’t run. Using a dark colored muffin pan also promotes a deeper golden brown color on the edges.
If you start with frozen fruit, thaw and drain it completely. This prevents excess liquid from making the crust soggy.
Exploring variations and alternative methods
Don’t feel locked into one specific ingredient list. This formula is wonderfully adaptable.
You can personalize these handheld sweets based on the season or what’s in your pantry. A few simple swaps keep the recipe exciting every time you make it.
Using fresh, frozen, or canned cherries
Your fruit choice defines the character of the dessert. For ultimate convenience, a 21 ounce can of pie filling is a major time saver.
If you prefer a more traditional approach, use fresh cherries. Just remember to pit and quarter them first.
Frozen fruit works well, too. Thaw and drain it completely to avoid a soggy crust.
For a unique flavor, mix Rainier and Bing cherries. This creates a delicious balance of sweet and tart notes in your filling.
Alternative dough and filling choices
You are not limited to the cream cheese dough. A store bought crust can significantly cut your prep minutes.
Feel free to experiment with other fruits. Blueberries or apples work beautifully with the same basic method.
Adjust the sugar in your mixture based on your fruit’s natural sweetness. If using frozen tart shells, preheat your oven to 350°F.
Bake for 20 to 22 minutes until the edges are golden. These options let you customize your little pies for any event.
Serving suggestions and presentation ideas
Serving your homemade sweets with style elevates them from simple to spectacular. The right presentation turns your baking effort into a memorable experience for everyone at the table.
Think about texture, temperature, and visual appeal. A few thoughtful touches make all the difference.
Pairing with whipped cream and other toppings
Ginnie recommends a generous dollop of fresh whipped cream for the best experience. This classic topping adds a light, cool contrast to the warm, baked pie.
For an extra crunch, sprinkle coarse sugar over the crust before baking. This gives your mini pie a beautiful, professional golden brown finish.
Let your desserts cool to room temperature after they come out of the oven. This allows the filling to set perfectly, making them much easier to eat.
You can also pair them with a side of vanilla ice cream. It’s a classic combination that everyone will enjoy.
For a savory balance, serve these little pies alongside a meal like Southwest Black Bean Veggie Burgers. A small mint leaf on top of the cream adds a pop of color.
Remember, your muffin pan will need a good scrub after use. Plan a few extra minutes for cleanup after your prep and baking are done.
Conclusion
Now you have all the knowledge to create memorable moments with a simple, beloved dessert.
You’ve learned how to bake delicious handheld sweets using straightforward ingredients and easy steps. Whether you make your own pie crust or use a store bought version, these little treats are sure to be a hit.
Remember, the secret lies in the quality of your fruit filling and the care you take during baking.
We hope you enjoy sharing these bite sized delights with family and friends at your next summer gathering. With these recipes in your collection, you can quickly whip up a batch whenever you need a sweet fix in just a few minutes.
Thank you for following along. We look forward to seeing your beautiful creations!
Your email will not be published publicly.