
Delicious biscoff ice cream recipes to try today
Did you know that the first batch of this delightful frozen treat was created in 2017 for a 4th of July celebration? Since then, it has become a beloved dessert at summer gatherings across the country.
You can easily master these delicious recipes by following simple techniques that transform basic pantry staples into a gourmet dessert. Whether you’re a novice or an experienced home cook, these instructions will help you achieve the perfect balance of spice and sweetness.
This guide provides everything you need to create a professional grade frozen delight that rivals your favorite local scoop shop. By combining high quality ingredients, you’ll ensure every bite is packed with that signature cookie flavor.
So, get ready to impress your friends and family with these mouthwatering creations!
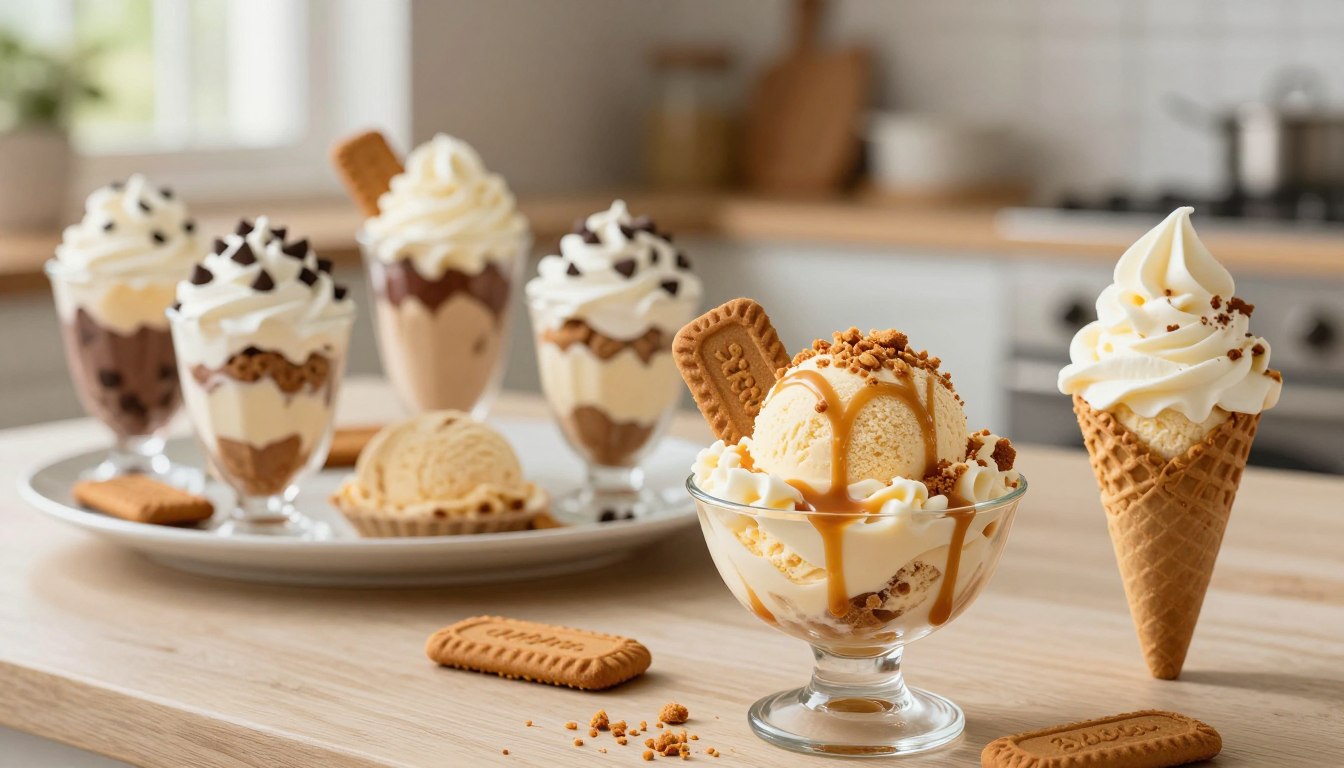
If you love the caramelized, spiced flavor of Biscoff cookies, you’re going to adore these biscoff ice cream recipes. No machine? No problem. Each version is no churn, incredibly creamy, and packed with cookie butter swirls and crunchy cookie pieces.
The first batch of this frozen treat was actually created in 2017 for a 4th of July celebration and it quickly became a summer classic across the country. Today, you can make the same crowd pleasing dessert at home with just a few simple ingredients.
Whether you’re a beginner or an experienced home cook, these recipes give you that perfect balance of spice, sweetness, and texture. The secret lies in quality dairy, real Biscoff spread (from Lotus Bakeries), and a few smart tricks to avoid ice crystals.
If you’re already a fan of easy frozen desserts, you’ll love our Oreo and Cake Ice Cream Recipes and our Chocolate and Ice Cream Cake both use the same no fuss, no machine approach.
For even more Biscoff inspiration, check out the 3 Ingredient Biscoff Ice Cream on Good Housekeeping (see the recipe here), the beautifully swirled version on Chef Not Required (read their method here), or the lotus Biscoff version on Baran Bakery (visit the recipe here).
Whether you swirl it, scoop it, or eat it straight from the bowl, this biscoff ice cream is a dessert you’ll want to make again and again. Ready to impress your friends and family? Let’s get started.
Overview of biscoff ice cream & its unique allure
In 2017, a new frozen sensation was born, quickly becoming a favorite across the nation. The allure of this delightful treat lies in its unique flavor profile. It combines the distinct notes of brown sugar and cinnamon found in the original cookies from Lotus Bakeries.
When you add these crisp cookies to your ice cream, the result is a wonderful texture contrast. This elevates the entire dessert experience for your guests. Unlike standard vanilla, this frozen delight offers a complex spice kick. It’s perfect for summer parties and holiday celebrations alike.
Your journey with this recipe may begin as mine did, inspired by cherished family traditions. The combination of cookie butter and crushed cookies creates a depth of flavor that is hard to beat. It truly sets this dessert apart from plain bases.
| Element | Details |
|---|---|
| Flavor Profile | Brown sugar, cinnamon, ginger |
| Texture | Crisp cookies combined with creamy base |
| Occasions | Summer parties, holidays |
| Key Ingredient | Original Biscoff cookies from Lotus Bakeries |
Essential ingredients for creamy biscoff ice cream
Creating a luscious frozen treat starts with selecting the right ingredients. The foundation of any great dessert lies in its components. For a delightful blend of flavors and textures, you need to focus on quality dairy and the unique cookie elements.
Quality dairy and sweeteners for rich texture
To achieve the most decadent texture, use 3 cups of heavy cream and 1 1/2 cups of whole milk as your primary dairy ingredients. This combination provides the richness essential for a creamy delight. Avoid using half and half or lower fat milk, as the high fat content from heavy cream is crucial for a professional mouthfeel.
Biscoff spread and cookie components
Incorporating 1 cup of Biscoff cookie butter ensures that the rich, spiced flavor permeates the entire mixture. This signature ingredient elevates your dessert, making it truly special. Additionally, opt for dark brown sugar over white sugar, as it contains more molasses, enhancing the warm spices found in the cookie butter.
Always ensure your cookie components are fresh. The crispness of the cookies provides the necessary crunch in every scoop.

| Ingredient | Amount |
|---|---|
| Heavy Cream | 3 cups (693 g) |
| Whole Milk | 1 1/2 cups (360 g) |
| Biscoff Spread | 1 cup (250 g) |
| Dark Brown Sugar | To taste |
| Biscoff Cookies | Fresh, crushed |
Must have equipment for your ice cream adventure
To embark on your ice cream journey, having the right tools is essential. The equipment you choose can greatly influence the texture and flavor of your frozen delights. A quality ice cream maker is at the top of the list.
Choosing the right ice cream maker
Investing in a reliable ice cream maker, such as the Cuisinart 2 Quart model, will significantly improve the consistency of your homemade frozen desserts. Here are some important tips:
- Always keep your ice cream maker bowl in the freezer, so it’s ready for use whenever cravings strike.
- A high quality cream maker allows you to churn your base in just 25 minutes, much faster than older methods.
- If you’re new to this process, read the manufacturer’s instructions to ensure the bowl reaches the required sub zero temperature.
- Proper maintenance, like rinsing the bowl and returning it to the freezer, keeps your ice cream maker ready for the next batch.
Mixing the perfect base: custard techniques and no churn tricks
The foundation of a delightful frozen treat lies in the technique you choose. Mastering the custard method can lead to a rich and creamy texture that elevates your dessert. To begin, whisk together 7 egg yolks with vanilla and sugar until the mixture thickens. You want to reach a maximum temperature of 160 degrees F for the perfect custard.
Tempering the eggs is crucial. Slowly add warm cream to the mixture to prevent scrambling. This step ensures a smooth, velvety custard base. Alternatively, if you prefer a simpler approach, consider a no churn ice cream recipe. These often rely on sweetened condensed milk, which lacks the depth of flavor found in traditional custard.
While no churn options are convenient, they yield a denser texture. Always chill your custard mixture to 40 degrees F before churning. A warm base won’t set properly, impacting the final product. With these techniques, you can create a delightful frozen treat that impresses every time.

Step by step guide to biscoff ice cream recipes
Transforming your kitchen into a delightful dessert haven is easier than you think. With the right techniques, you can create a frozen treat that impresses everyone. Follow these steps to ensure your creation has the perfect texture and flavor.
Churning, mixing, and freezing for optimal texture
Begin by pouring your chilled custard into the machine. Churn it for about 20 minutes until the mixture thickens into a soft serve consistency. This is crucial for achieving that creamy texture you desire.
During the final 5 minutes of churning, slowly add your Biscoff cookie butter and broken cookie pieces. This ensures they are evenly distributed throughout the ice cream, enhancing every bite.
Once churning is complete, transfer the mixture to a shallow container. Drizzle extra cookie butter on top to create beautiful, flavorful swirls.
Finally, freeze your finished biscoff ice cream for at least 2 hours. This allows the texture to firm up, making it easier to scoop. Layering your cookie pieces throughout the container guarantees that every serving is packed with crunch and flavor.
Flavor variations and creative additions
Exploring new flavors can elevate your dessert experience. You can easily customize your creation by adding delightful twists. Chocolate and vanilla are two fantastic options that pair beautifully with the unique flavor of cookie butter.
For instance, consider adding a rich chocolate swirl or dark chocolate chips. This addition complements the warm cinnamon notes perfectly. An extra teaspoon of pure vanilla extract will also brighten the overall flavor profile, enhancing the cookie butter’s taste.
For a more decadent treat, fold in crushed chocolate sandwich cookies alongside your cookie pieces. This creates a multi textured dessert experience that everyone will love. If you prefer a lighter profile, reduce the amount of cookie butter and increase the vanilla. This lets the creamy dairy notes shine through.
Experimenting with these variations allows you to transform a standard recipe into a signature dessert. It reflects your personal taste and creative flair, making each scoop a unique delight.
Storing and serving your creamy delight
Storing your homemade dessert properly is essential for maintaining its delicious flavor and texture. To ensure the best quality, keep your frozen treat in an airtight, freezer safe container. It’s best to consume it within 2 weeks for optimal taste.
Before sealing the lid, place a piece of plastic wrap directly on the surface of the dessert. This step prevents unwanted ice crystals from forming, keeping your treat smooth and creamy.
Optimal freezer storage and airtight techniques
- Using a shallow, flat container provides more scooping space and helps maintain a consistent temperature.
- Always keep your freezer at a steady temperature to prevent cycles of melting and refreezing.
- Remember to wrap your dessert well to keep its flavor intact for the entire storage time.
Presenting your homemade treat with style
When serving, consider garnishing each bowl with a whole Biscoff cookie. This not only adds a decorative touch but also highlights the primary ingredient. A beautiful presentation enhances the overall experience, making your dessert even more enjoyable.
Pairing ideas to enhance your biscoff experience
Pairing your favorite desserts with the right beverages can elevate your tasting experience. The right choices can bring out the unique flavors of your creations.
For a delightful drink, consider these options:
- A rich barley wine is an excellent beverage pairing because its caramel like malt notes wonderfully complement the brown sugar found in the cookie butter.
- If you prefer wine, a glass of tawny port offers dried fruit notes and a touch of spice that pair beautifully with the creamy dessert.
- For a cocktail option, a chai old fashioned made with a brown sugar chai simple syrup creates an obvious match to the primary flavors of the dessert.
- You can serve your ice cream alongside warm Biscoff blondies or muffins to create a decadent dessert platter that will impress any cookie lover.
- The warm bourbon in a cocktail helps cut through the richness of the dairy, making it a sophisticated choice for an evening treat with friends.

Final scoop: savor the sweet success of your creation
Congratulations on mastering the art of crafting a delectable frozen treat! You have now followed this comprehensive guide to create a professional quality dessert.
Taking the time to properly temper your eggs and chill your base ensures that your final result is as creamy and delicious as possible. Whether you enjoy it plain or with creative additions, this recipe is sure to become a favorite in your household for years to come.
Remember that the secret to success lies in using high quality ingredients and not rushing the churning or freezing time required for the perfect texture. I hope you enjoy every spoonful of your homemade creation and feel inspired to share this delightful treat with your friends and family.
Your email will not be published publicly.