
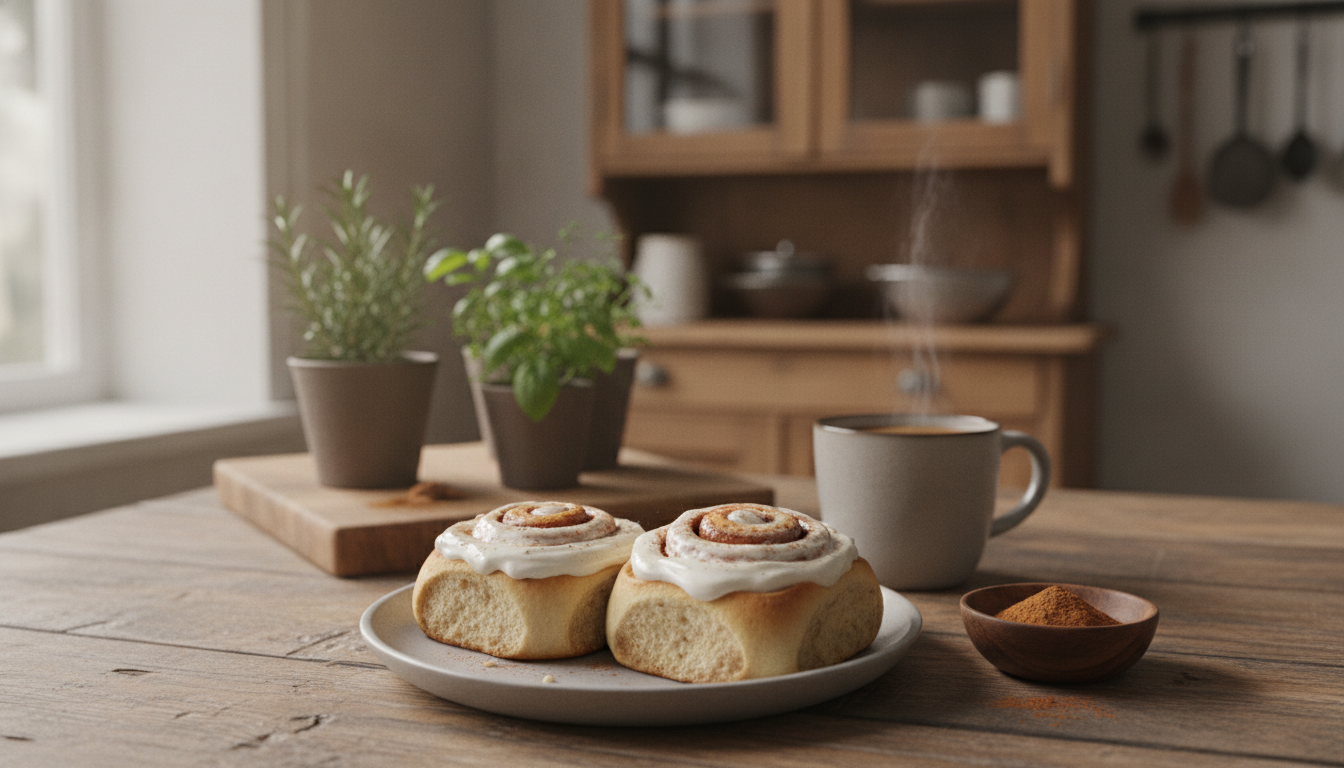
Vegan cinnamon rolls recipe for easy homemade treats
Imagine waking up on a chilly morning, the aroma of freshly baked goods wafting through your home. You step into the kitchen, where a warm tray of fluffy rolls awaits you. These delightful treats are not just for special occasions; they can brighten any day.
Even those who typically shy away from plant based options find themselves drawn to these sweet delights. Many have discovered that they prefer this alternative to the traditional version they grew up with. With a simple method, you can master the art of making these delicious rolls in no time.
What’s even better? You can prepare them the night before. This means a stress free morning filled with the joy of enjoying warm, gooey goodness without the hassle. The texture is identical to what you remember, ensuring that every bite is filled with the comforting flavors you love.
This recipe is surprisingly simple. The dough comes together with plant-based milk, vegan butter, flour, and yeast then rises to pillowy perfection. A generous spread of cinnamon sugar filling, a tight roll, and a bake later, you’ll have golden, gooey rolls that are impossible to resist. Top them with a simple glaze or a dairy free cream cheese icing for extra decadence.
If you love easy homemade treats, you’ll also enjoy our Orange Creamsicle Cookies for a bright citrus cookie, our Easy Hand Pie Recipe for a fun handheld dessert, or our Japanese Milk Bread Recipe for another soft, pillowy bake.
For more vegan baking inspiration, Allrecipes’ vegan cinnamon rolls recipe (see it here →) is a trusted reference with clear instructions and helpful tips for perfect rolls every time.
Introduction to vegan cinnamon rolls
Picture a cozy morning filled with the delightful scent of baked treats wafting through your kitchen. These sweet rolls are not only delicious but also a healthier option. They are entirely refined sugar free, making them a fantastic alternative to store bought versions.
What sets these rolls apart? The recipe swaps traditional eggs for unsweetened dairy free yogurt or applesauce. This keeps the dough soft and tender. Additionally, using coconut sugar adds a caramelized flavor, enhancing the overall taste.
With the inclusion of vanilla extract, each bite becomes aromatic and delightful. Perfect for those who avoid dairy, these rolls use plant based fats like vegan butter or coconut oil. By following these simple steps, you can enjoy homemade treats free from funky ingredients.
Ingredients and essential tools
Envision a sunny day where the sweet scent of baking fills the air, inviting you to indulge. To create those delightful treats, you’ll need a few key ingredients and essential tools.
Key ingredients for delicious rolls
- Vegan Butter: Brands like Miyoko’s, Earth Balance, and Flora Plant are perfect for a rich, tender crumb.
- Flour: Bob’s Gluten Free Cup for Cup Flour is an excellent choice for gluten free options.
- Yeast: Active dry yeast or rapid rise yeast is crucial for achieving the perfect rise.
- Milk: Use a food thermometer to ensure it reaches 110°F for optimal yeast activation.
- Cinnamon: The star of the filling, adding that warm, comforting flavor.
- Sugar: Coconut sugar or regular sugar enhances sweetness.
- Vanilla: A splash adds depth to the flavor.
- Cream Cheese: For a delightful frosting, use your favorite plant based cream cheese.
Must have kitchen equipment
Having the right tools makes the process easier:
- A medium and large bowl for mixing and rising the dough.
- A pastry brush for spreading the filling evenly.
- A pizza cutter or unflavored dental floss for slicing the rolls without squishing them.
| Ingredient | Purpose | Recommended brands |
|---|---|---|
| Vegan Butter | Richness and tenderness | Miyoko’s, Earth Balance |
| Flour | Structure | Bob’s Gluten Free |
| Yeast | Leavening agent | Active dry, rapid rise |

Step by step vegan cinnamon rolls recipe instructions
Imagine the thrill of creating warm, fluffy treats that fill your kitchen with sweet aromas. Follow these simple steps to master the art of making delightful rolls.
Activating yeast and preparing the dough
Start by heating your dairy free milk to exactly 110°F using a food thermometer. This temperature is crucial, as too much heat will deactivate the yeast. Once heated, combine the milk with the yeast and let the mixture sit for 10 minutes. You’ll know it’s ready when it becomes foamy and has a beer like smell.
Creating the perfect filling and rolling technique
Next, roll your dough out into a 12″ by 18″ rectangle on a lightly floured surface. This ensures even distribution of the cinnamon filling. After spreading the filling, roll the dough tightly. Use unflavored dental floss to slice 12 even rolls, preserving their beautiful spiral shape.
Finally, bake your rolls at 350°F for 20-22 minutes. They should turn a light golden brown without drying out. For an extra plush texture, pour vegan heavy cream into the crevices just before baking.
| Step | Action | Time |
|---|---|---|
| 1 | Heat milk and activate yeast | 10 minutes |
| 2 | Roll out dough | 5 minutes |
| 3 | Slice rolls | 5 minutes |
| 4 | Bake rolls | 20-22 minutes |
Tips for achieving the perfect roll dough
Visualize a warm afternoon where the enticing scent of freshly baked treats fills your home. Achieving the perfect roll dough is all about technique. Follow these tips to ensure your dough is soft and fluffy.
First, knead the dough for about 2-4 minutes. This is crucial for creating a smooth, non sticky ball. Proper kneading develops gluten, giving your rolls the desired texture.
Next, place your dough in a greased bowl. Cover it with a clean kitchen towel or plastic wrap. This prevents the dough from drying out as it rises.
Allow the dough to rise in a warm area. An oven with the light turned on works well. Wait until it has doubled in size, which usually takes about an hour.
If your dough isn’t rising properly, check the temperature. It should be at least 80°F. Warmth is essential for yeast activity.
Finally, avoid overworking the dough after the first rise. Keeping it thick helps maintain the structure and prevents cracks in your rolls. If you notice the dough struggling to rise, use a damp, warm towel over the bowl for added humidity.
| Tip | Action | Time |
|---|---|---|
| Kneading | Knead until smooth | 2-4 minutes |
| Covering | Cover to retain moisture | During rise |
| Rising | Let rise in warmth | 1 hour |

Troubleshooting and common issues
Start your baking adventure with the warm, inviting scent of fresh pastries filling your kitchen. However, even the best bakers encounter challenges. Understanding how to troubleshoot common issues can make all the difference.
First, let’s tackle yeast activation hurdles. If your yeast does not foam after 10 minutes, it is likely inactive. In this case, discard the mixture and start over with fresh yeast. Always ensure that all liquid ingredients, such as applesauce, are at room temperature to prevent temperature shocks that could ruin the dough’s texture.
Solving yeast activation hurdles
For optimal results, consult the Fleischmann’s Yeast Guide if you are unsure about the health of your yeast. It provides detailed information on activation. Remember, using a wooden spoon for mixing is crucial, as some metal utensils can negatively react with yeast.
Adjusting dough texture and consistency
If your dough feels too sticky, add a small amount of extra flour. Be cautious, as too much flour can lead to dense rolls. If you’re looking for a smaller batch, you can adapt this recipe to make just four rolls, perfect for a quick weekend breakfast treat.
Variations, customizations, and serving ideas
Think of the joy of experimenting with unique fillings and frostings that elevate your baked goods to new heights. You can easily create a decadent cream cheese frosting by combining 1/2 cup of dairy free cream cheese with 1 cup of powdered sugar. This creamy topping perfectly complements the sweetness of your rolls.
If you’re a chocolate lover, consider modifying the base recipe to create small batch chocolate cinnamon rolls. They are incredibly rich and satisfying, making them a perfect treat for any occasion. For a seasonal twist, add 2 tablespoons of pure maple syrup to your cream cheese frosting.
The recipe is highly adaptable. You can swap brown sugar for coconut sugar in the filling to achieve a deeper, caramelized taste. Always spread your frosting while the rolls are still warm. This ensures it melts slightly into the crevices for maximum gooeyness.
If you want to keep the dish entirely nut free and dairy free, you can use coconut cream as a substitute for heavy cream. This allows everyone to enjoy these delightful treats!

Storage, reheating, and leftover tips
Consider the satisfaction of knowing your sweet treats can last for days. Proper storage and reheating techniques can keep your homemade delights fresh and enjoyable.
Proper storage methods
To maintain the quality of your delicious treats, store any leftover rolls in an airtight container. They will stay fresh in the refrigerator for up to 4 days. Always ensure they are completely cool before sealing to prevent moisture buildup.
Best techniques for reheating
When it’s time to enjoy your rolls again, you have a few options:
- Place the rolls on a baking sheet lined with parchment paper and warm them in the oven at 350°F for 5-7 minutes.
- If you’re in a hurry, microwave a single roll for 45 seconds to restore its soft, gooey consistency.
- For overnight options, keep the rolls covered in the fridge and let them sit on the counter for 50 minutes before baking.
Additionally, you can place cold rolls in an oven that is turned off with the light on for 20-25 minutes to help them proof. Always store your frosting properly, especially if it contains vegan cream cheese, to ensure it remains safe for consumption over several days.
Conclusion
In the early hours, the comforting smell of baked delights wraps around you, creating a sense of joy. Mastering this cinnamon rolls recipe allows you to create professional quality treats perfect for any holiday brunch or weekend morning.
By following the specific temperature guidelines for your milk and yeast, you ensure that every batch rises perfectly for that signature fluffy texture. Remember that patience is key, as allowing the dough to proof for the full hour is essential for achieving the best possible results.
Whether you choose to bake them immediately or use the overnight method, these rolls remain a reliable favorite for everyone. We encourage you to experiment with different fillings and frostings, such as the classic cream cheese frosting, to make this dish your own.
Thank you for choosing this guide to help you bake the best cinnamon rolls, and we hope you enjoy every single gooey, delicious bite!
FAQ
How long do I need to let the dough rise?
You should let the dough sit for about an hour until it doubles in size. This is crucial for achieving that fluffy texture.
Can I use regular butter instead of vegan butter?
While you can use regular butter, it won’t keep the recipe dairy-free. If you’re looking for a vegan option, stick with vegan butter.
What can I use instead of cream cheese for frosting?
If you prefer a different flavor, you can substitute with a dairy-free yogurt or a cashew cream for a creamy texture.
How should I store leftover rolls?
Keep them in an airtight container at room temperature for up to two days, or refrigerate them for longer freshness.
Can I freeze the rolls after baking?
Yes, you can freeze them! Just make sure they are completely cooled before wrapping them tightly and placing them in the freezer.
What if my rolls don’t rise properly?
This could be due to inactive yeast. Make sure your yeast is fresh and activated properly before mixing it with the other ingredients.
How can I make these rolls gluten-free?
You can substitute all-purpose flour with a gluten-free flour blend. Just ensure that it has a binding agent, like xanthan gum, for the best results.
Your email will not be published publicly.