

Easy 2kg birthday tart recipe for beginners: Your first big celebration dessert
Meta Description: Learn how to make a stunning 2kg birthday tart with this beginner friendly recipe. Simple ingredients, clear instructions, and foolproof techniques for your first large celebration tart.
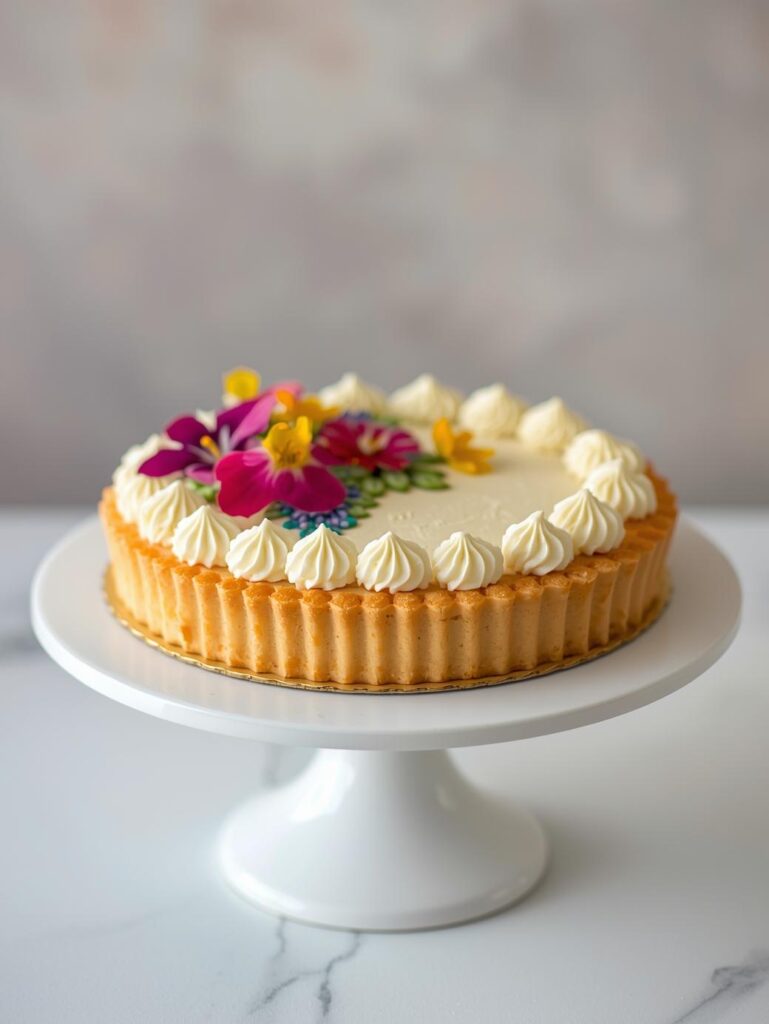
Making your first large tart can feel intimidating, but I’m here to tell you it’s absolutely doable. This 2kg birthday tart recipe is specifically designed for complete beginners. No fancy techniques, no complicated steps, just a straightforward path to creating a beautiful, delicious dessert that serves 10-12 people.
I remember the first time I attempted a large tart. I was nervous about everything would the crust hold? Would it bake evenly? Would it look presentable? But here’s what I learned: with the right recipe and clear instructions, even your first attempt can be successful and impressive.
This recipe yields approximately 2kg of finished tart, perfect for birthday parties, family gatherings, or any celebration where you need a show stopping dessert. The best part? You don’t need professional skills or expensive equipment. Just follow along, and I’ll guide you through every single step.
Why this recipe is perfect for beginners
I’ve designed this recipe with first time tart makers in mind. The crust is forgiving and easy to handle. The filling is simple custard cream that doesn’t require precise temperature control. And the decoration? Fresh fruit arranged however you like there’s no wrong way to do it.
A simple birthday tart recipe for beginners
Unlike delicate French tarts that require years of practice, this sturdy recipe can handle beginner mistakes. Cracked the crust a bit? The filling covers it. Filling not perfectly smooth? The fruit hides everything. Your first tart might not be Instagram perfect, but it will taste absolutely delicious.
The 2kg size means you’re making one large statement piece instead of fiddling with multiple small tarts. It’s actually easier to manage one big tart than several small ones when you’re just starting out.
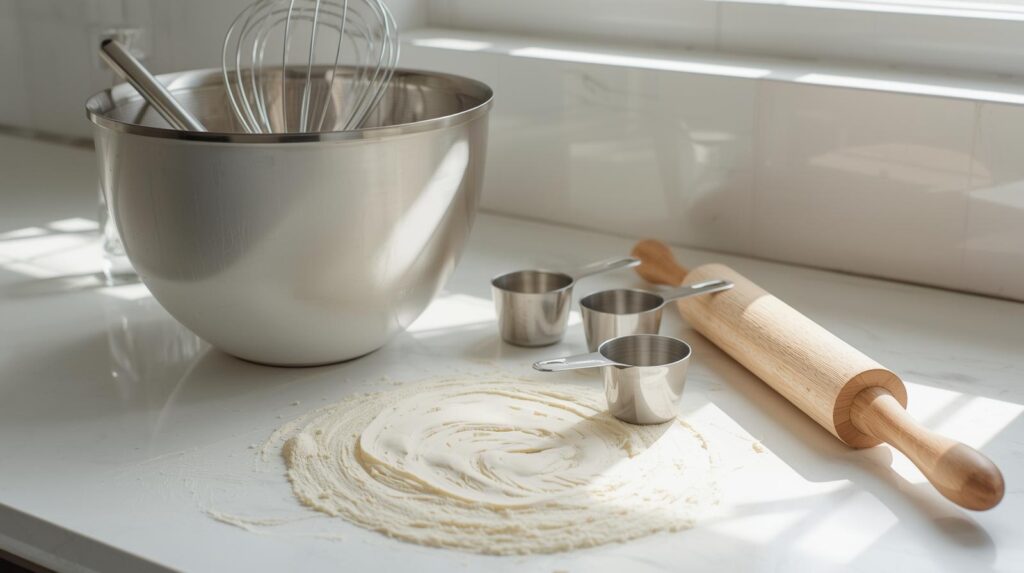
Equipment you’ll need
Before we start, let’s gather everything. Don’t worry you probably have most of these items already:
- One 10-12 inch (25-30cm) tart pan or springform pan
- Mixing bowls (various sizes)
- Rolling pin (or a clean wine bottle works too)
- Whisk and wooden spoon
- Measuring cups and spoons
- Plastic wrap
- Parchment paper
- Pie weights, dried beans, or rice (for blind baking)
- Pastry brush (optional but helpful)
Ingredients for your 2kg birthday tart
I’ve broken this down into simple sections so you don’t get overwhelmed. This recipe makes approximately 2kg of finished tart.
For the tart crust (About 800g)
- 3 cups (375g) all-purpose flour
- ½ cup (100g) granulated sugar
- ½ teaspoon salt
- 1 cup (225g) cold unsalted butter, cut into small cubes
- 2 large eggs
- 2-4 tablespoons cold water
- 1 teaspoon vanilla extract
For the cream filling (About 900g)
- 4 cups (1 liter) whole milk
- ¾ cup (150g) granulated sugar
- 6 large egg yolks
- ½ cup (60g) cornstarch
- 4 tablespoons (60g) unsalted butter
- 2 teaspoons vanilla extract
- ¼ teaspoon salt
For topping and decoration (About 300g)
- 3-4 cups mixed fresh fruits (strawberries, kiwi, grapes, blueberries, mandarin segments)
- ½ cup apricot or strawberry jam (for glazing)
- Fresh mint leaves (optional)
- Powdered sugar for dusting

Step by step instructions for beginners
Part 1: Making the tart crust (Don’t Worry, This is Easy!)
Let’s start with the foundation. Take a deep breath you’ve got this.
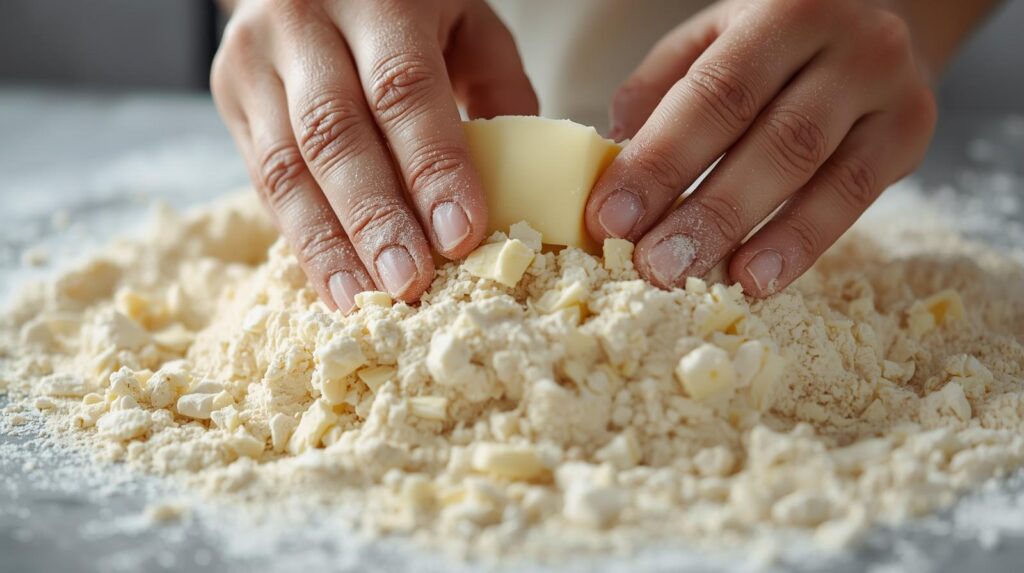
Step 1: In a large bowl, mix together your flour, sugar, and salt with a fork. This is called “dry ingredients” and it’s the easiest step.
Step 2: Add your cold butter cubes. Using your fingertips (yes, your hands!), rub the butter into the flour. Imagine you’re making it rain with flour and butter between your fingers. Keep going until it looks like breadcrumbs with some pea-sized butter pieces. This takes about 5 minutes. Your hands will get messy that’s normal and okay.
Step 3: In a small bowl, beat your eggs lightly with a fork. Add the vanilla extract. Pour this into your flour mixture.
Step 4: Using a wooden spoon or your hands, mix everything together. If the dough seems too dry and crumbly, add water one tablespoon at a time. The dough should come together into a ball but not be sticky.
Step 5: Press the dough into a flat disk, wrap it in plastic wrap, and put it in the refrigerator for at least 1 hour. I know waiting is hard, but this step is super important. It makes the dough easier to roll and prevents it from shrinking when you bake it.
Beginner Tip: If you accidentally add too much water and the dough is sticky, just add a tablespoon of flour and mix again. It’s very forgiving!
Part 2: Making the cream filling (Easier Than You Think!)
While your dough is chilling, let’s make the cream. This is basically fancy pudding, and if you can make pudding, you can do this.
Step 1: Pour your milk into a medium-large saucepan. Heat it on medium heat until you see small bubbles around the edges, but don’t let it boil. Then turn off the heat.
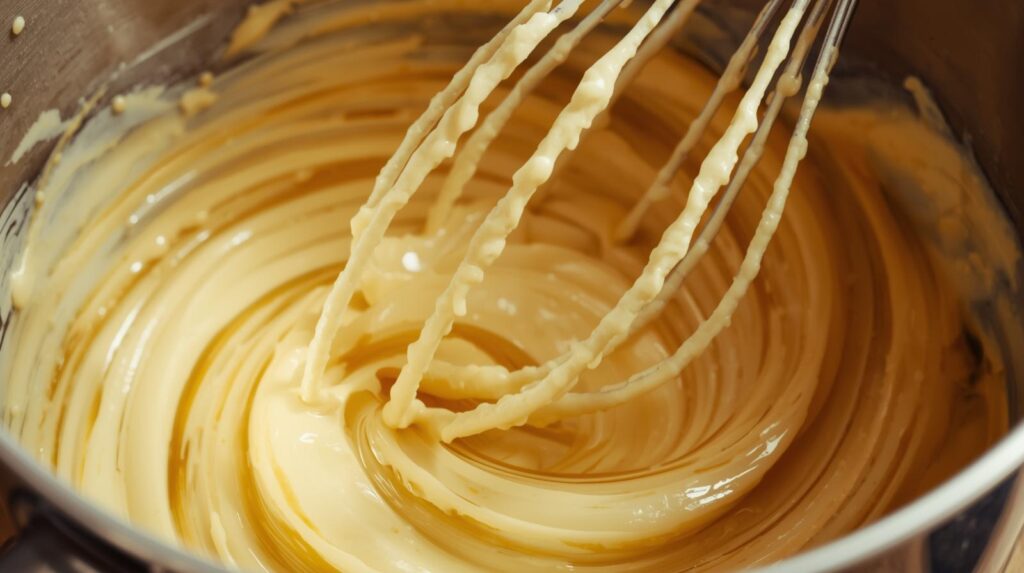
Step 2: In a bowl, whisk together the egg yolks, sugar, and cornstarch. Whisk hard for about 1 minute until it’s smooth and a little bit pale yellow.
Step 3: Here’s the important part (but still easy): Slowly pour about 1 cup of the hot milk into your egg mixture while whisking constantly. This is called “tempering” and it stops the eggs from cooking too fast and getting scrambled.
Step 4: Now pour this mixture back into the saucepan with the rest of the milk. Put it back on medium heat.
Step 5: Whisk constantly. At first nothing happens. Keep whisking. After about 3-5 minutes, suddenly it will get thick like pudding. Keep whisking for 1 more minute.
Step 6: Remove from heat. Add the butter, vanilla, and salt. Stir until the butter melts completely.
Step 7: Pour the cream into a clean bowl. Press plastic wrap directly onto the surface (this prevents a skin from forming). Let it cool to room temperature, then refrigerate.
Beginner Tip: If you see a few lumps, don’t panic! Just pour the cream through a strainer and push it through with a spoon. Problem solved!
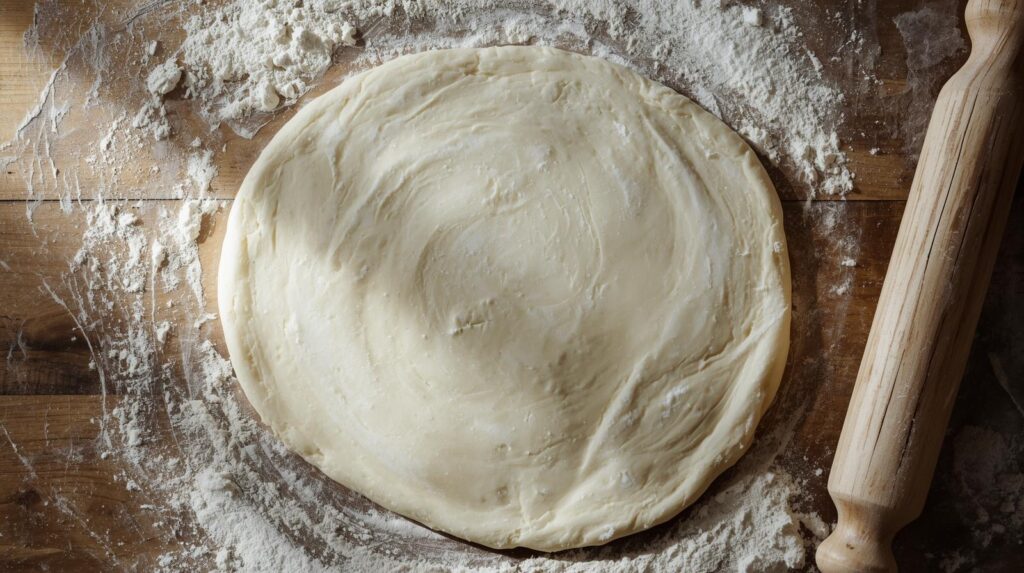
Part 3: Rolling and baking the crust
Okay, your dough has chilled. Time to transform it into a tart shell.
Step 1: Preheat your oven to 350°F (175°C).
Step 2: Take your dough out of the fridge. If it’s super hard, let it sit for 10 minutes to soften slightly. It should be cold but not rock-hard.
Step 3: Sprinkle some flour on your counter and on your rolling pin. Put the dough in the middle.
Step 4: Roll from the center outward, turning the dough a quarter turn every few rolls. Keep rolling until you have a circle about 14 inches (35cm) across and about ¼ inch thick. If it cracks at the edges, just press it back together with your fingers no one will know!
Step 5: Gently roll the dough around your rolling pin, then unroll it over your tart pan. Press it gently into the bottom and sides. Don’t stretch it just let it fall naturally into place.
Step 6: Trim off the excess dough around the edges with a knife, leaving about ½ inch hanging over. This extra will shrink during baking.
Step 7: Prick the bottom all over with a fork. This prevents bubbles.
Step 8: Put the whole pan in the freezer for 15 minutes. This helps prevent shrinking.
Part 4: Blind baking (Yes, You Can Do This!)
“Blind baking” just means baking the crust without filling. It sounds fancy, but it’s simple.
Step 1: Cut a piece of parchment paper bigger than your tart pan. Scrunch it up into a ball, then open it again and press it into your frozen tart shell.
Step 2: Fill it with pie weights, dried beans, or rice. This keeps the crust from puffing up.
Step 3: Bake for 20 minutes.
Step 4: Carefully remove the parchment and weights. Bake for another 15-20 minutes until the crust is golden brown all over.
Step 5: Let it cool completely in the pan.
Beginner Tip: The crust might puff up a little even with weights—that’s okay! Just gently press it down with the back of a spoon while it’s still hot.
Part 5: Assembly (The Fun Part!)
This is where your tart comes to life. No stress fresh fruit looks beautiful no matter how you arrange it.
Step 1: Give your pastry cream a good whisk to make it smooth and creamy again.
Step 2: Pour all the cream into your cooled tart shell. Use a spatula or the back of a spoon to spread it evenly. It should come almost to the top.
Step 3: Prepare your fruit:
- Wash and dry everything
- Cut strawberries in half or quarters
- Peel and slice kiwis
- Keep grapes and blueberries whole
- Separate mandarin segments
Step 4: Arrange the fruit on top however you like. Here are some beginner-friendly patterns:
- Circles: Start from the outside and work inward in circles
- Rows: Make straight lines of different colored fruits
- Random: Just scatter everything beautifully honestly, this often looks the best!
Step 5: Make the glaze: Put your jam in a small bowl and microwave for 20-30 seconds until it’s liquid. Stir in 1 tablespoon of water.
Step 6: Using a pastry brush (or a spoon works too), gently brush the glaze over all the fruit. This makes everything shiny and keeps the fruit fresh.
Step 7: If you want, add a few mint leaves and dust lightly with powdered sugar.
Important tips for first time tart makers
Let me share the most common beginner mistakes and how to avoid them:
Keep everything cold: When working with the dough, cold butter = flaky crust. If your kitchen is hot, work quickly or chill the dough between steps.
Don’t skip the chilling: I know it’s tempting, but every time I tell you to refrigerate something, it’s for a good reason. Patience pays off.
Measure carefully: Baking is like science. Use proper measuring cups and level everything off. Too much flour makes tough crust; too much liquid makes sticky dough.
Embrace imperfection: Your first tart won’t look like a professional bakery’s, and that’s completely fine. Homemade beauty is in the slight imperfections.
Taste as you go: When making the cream, taste it before it thickens. Not sweet enough? Add a bit more sugar. Want more vanilla? Add it. Make it yours.
How to know when each step is done
Crust dough is ready when: It holds together when squeezed but isn’t sticky. If you poke it, it should feel firm but not hard.
Cream is thick enough when: It coats the back of a spoon and doesn’t drip off immediately. When you drag your finger through it on the spoon, the line stays clear.
Baked crust is done when: It’s golden brown all over, including the bottom. The edges will be slightly darker, and that’s perfect.
Tart is ready to serve when: It’s been refrigerated for at least 2 hours and the cream is set. It should slice cleanly without the cream oozing everywhere.
Serving your 2kg birthday tart
Your tart serves 10-12 people generously. Here’s how to serve it like a pro:
Step 1: Use a large, sharp knife. Wipe it clean between each slice.
Step 2: Cut from the center outward, making triangular slices like a pizza.
Step 3: Use a wide spatula to lift each slice onto plates.
Step 4: Serve at room temperature or slightly chilled. I personally think it tastes best when it’s been out of the fridge for about 20 minutes.
You don’t need anything else with this tart it’s complete as is. But if you want to be fancy, a small dollop of whipped cream on the side is lovely.
Storage instructions
Before cutting: Cover loosely with plastic wrap and refrigerate for up to 2 days. The crust stays surprisingly crisp!
After cutting: Cover the exposed cream with plastic wrap and refrigerate. Eat within 24 hours for best quality.
Can you freeze it? Honestly, I don’t recommend freezing this tart once it’s assembled. The cream and fruit don’t freeze well. However, you can freeze the unbaked crust for up to 1 month.
Make ahead timeline for stress free baking
2 days before: Make and bake the tart shell. Store at room temperature wrapped in plastic.
1 day before: Make the pastry cream. Keep refrigerated with plastic wrap pressed on the surface.
4 hours before serving: Fill the tart shell with cream, arrange fruit, and glaze. Refrigerate until serving time.
This timeline is perfect for birthday parties when you’re busy with other preparations!
Troubleshooting common beginner problems
My dough is too crumbly and won’t come together: Add water one teaspoon at a time and mix gently. It needs moisture to bind.
My dough is too sticky: Add flour one tablespoon at a time. Also, make sure to chill it cold dough is easier to handle.
The crust shrunk during baking: This happens when the dough wasn’t chilled enough or was stretched into the pan. Next time, chill longer and let the dough relax into the pan naturally.
My cream has lumps: Pour it through a fine strainer while it’s still hot. Push it through with a spoon. The lumps will stay behind and your cream will be smooth.
The cream is too thin: Put it back on the heat and cook it a bit longer, whisking constantly. It will thicken up.
The fruit made the tart soggy: Make sure the crust is completely cool before adding cream. Also, glaze the fruit immediately after arranging the glaze seals it and prevents juices from leaking.
Variations to try after you’ve mastered the basic recipe
Once you’re comfortable with this recipe, here are some easy variations:
Chocolate lovers: Add ¼ cup cocoa powder to the crust and 4 ounces melted dark chocolate to the cream.
Lemon version: Add lemon zest to the cream and use only berries for topping.
Nutty crust: Replace ½ cup of flour with finely ground almonds in the crust recipe.
Different fruits: Try tropical fruits (mango, passion fruit), stone fruits (peaches, plums), or even banana slices with chocolate drizzle.
Why your first tart will be amazing
Here’s what I want you to remember: every expert baker made their first tart once. And I guarantee theirs wasn’t perfect either. Mine had a crack in the crust, slightly lumpy cream, and the fruit arrangement was chaotic. But you know what? Everyone at that party said it was delicious, and it gave me the confidence to keep baking.
Your 2kg birthday tart is going to bring joy to your celebration. It’s going to taste incredible because you made it with care. And even if it has small imperfections, the people eating it will be impressed that you baked something so beautiful from scratch.
Frequently asked questions for beginners
I’ve never made pastry before. Is this really suitable for beginners?
Yes! I’ve taught this recipe to complete beginners, including people who had never baked anything. If you can follow instructions and measure ingredients, you can make this tart. Take your time, read each step fully before starting, and don’t rush.
Can I use store bought crust to make it easier?
Absolutely. Buy a pre-made tart shell or pie crust from the store. You’ll need about 800g of pre-made dough. Just skip to the cream-making section. No judgment everyone starts somewhere!
What if I don’t have a tart pan?
Use a springform pan or even a regular pie dish. The shape will be different, but the taste will be the same. For a 2kg tart, use a 10-12 inch pan.
How do I know if my cream is thick enough?
Dip a spoon in the cream and run your finger across the back. If the line stays clear and doesn’t run together, it’s ready. It should look like thick pudding.
Can I make this without eggs?
The eggs are important for both the crust and cream. There are egg free versions, but they require different recipes with different techniques. For your first tart, I’d recommend sticking with this recipe.
What’s the most important tip for success?
Don’t rush the chilling steps. I know it’s tempting to skip them, but chilled dough and cream are much easier to work with and give better results.
Final encouragement
You’re about to make your first 2kg birthday tart, and I’m genuinely excited for you. There’s something magical about creating a beautiful dessert with your own hands. Yes, it takes time. Yes, there are multiple steps. But each step is simple on its own.
Remember: professional bakers aren’t better than you—they’ve just had more practice. This is your practice. This is your learning experience. And at the end, you’ll have a gorgeous, delicious 2kg tart that you made yourself.
Don’t aim for perfection. Aim for completion. Aim for learning. Aim for the joy on people’s faces when they taste what you created.
You’ve got this. Now let’s bake!

Recipe Details:
- Prep Time: 30 minutes (plus 1 hour chilling)
- Bake Time: 35-40 minutes
- Assembly Time: 30 minutes
- Total Time: 3 hours
- Yield: 2kg tart (serves 10-12 people)
- Difficulty: Beginner friendly
Conclusion
This easy 2kg birthday tart recipe for beginners is the perfect choice for your first big celebration dessert. With simple ingredients and clear step by step instructions, you can confidently create a beautiful and delicious tart that impresses guests without stress.
Whether it’s a birthday, family gathering, or special event, this recipe proves that beginners can achieve professional-looking results at home. Save this recipe for future celebrations and explore more easy dessert ideas on our website, Easy Puff Pastry Recipe: Complete Guide to Flaky Homemade Puff Pastry,and The Ultimate New York Cheesecake Recipe: Creamy, Rich & Perfect Every Time, for more information history tart read this wikipedia
Your email will not be published publicly.