
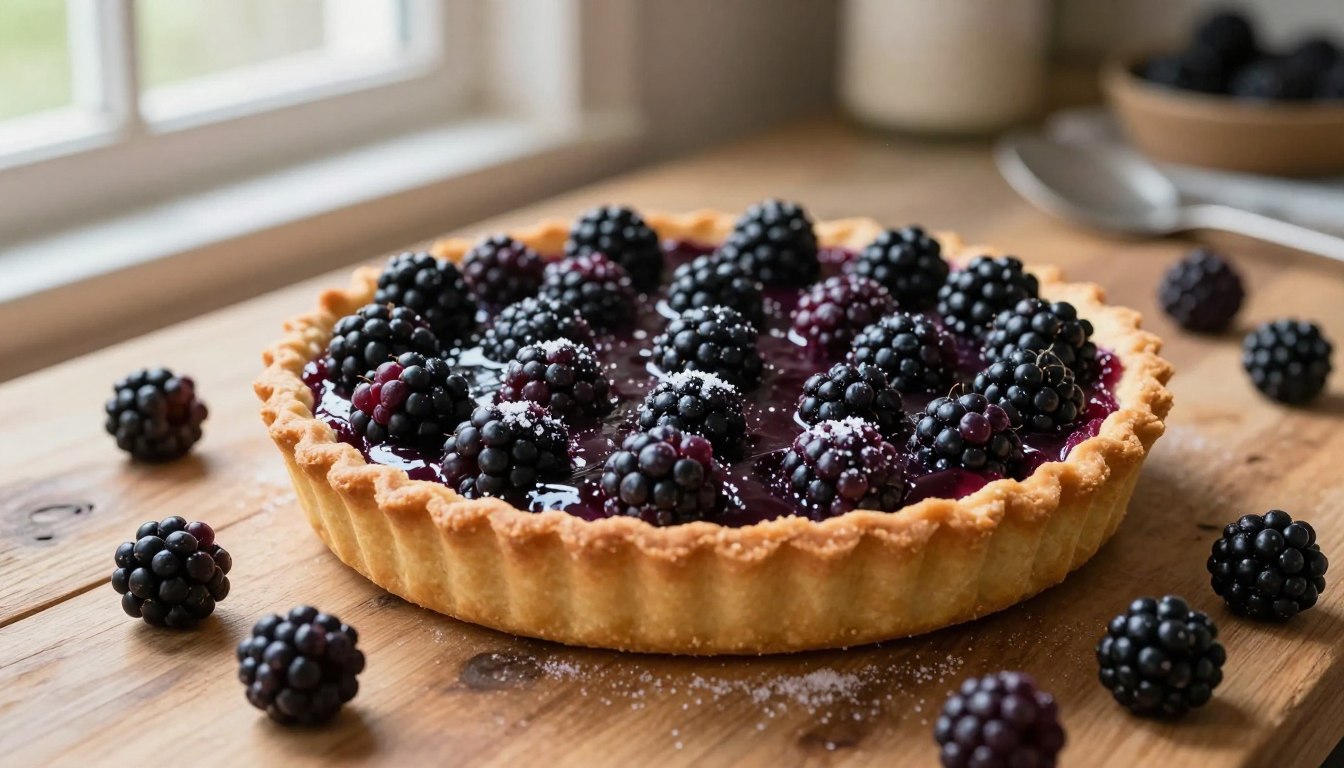
I made this blackberry tart 4 times: here are my best tricks
Last July, I was looking at a pint of fresh fruit from the local market. I wanted to make something special for my neighbors but didn’t have time for a big project. That day, I learned you don’t need to be a pro to bake a beautiful dessert.
This simple yet elegant dish shows off the sweetness of fresh produce. It’s the ideal choice for summer parties or cozy nights in. It turns simple ingredients into a fancy treat that wows everyone.
Whether you’re new to baking or have been doing it for years, this blackberry tart is quick to make. Using top notch ingredients makes it a memorable treat. Let’s get started on this delightful recipe that everyone will love.
That pint of fresh blackberries from the market turned into something I didn’t expect: a tart that looked professional, tasted extraordinary, and took about 90 minutes from start to finish. The kind of dessert that makes neighbors ask which bakery it came from and genuinely surprised when you tell them you made it yourself, on a weekday, without a single fancy tool.
The trick is understanding what blackberries need in a tart. They release liquid as they bake more than you’d think and if you don’t account for that with the right cornstarch ratio, you end up with a soggy shell and a runny filling that looks nothing like the glossy jewel toned result you’re after.
The fix is simple: mash about two thirds of the berries into the sugar and cornstarch before they go into the shell, then top with the remaining whole berries. The mashed base creates a thick, jammy filling. The whole berries on top stay intact and make the tart look like it came from a window display.
Four tricks cover everything else: the blind bake that gives the shell a head start so it stays crisp under wet fruit, the temperature drop mid bake that sets the filling without burning the edges, the apricot glaze brushed on while the tart is still warm, and the cooling window that lets everything firm up before you slice.
If refined nut based tarts speak to you, our Almond Tart uses a frangipane filling under seasonal fruit in a more structured French format and you could use exactly the same almond base underneath these blackberries for a more layered result.
For something completely outside the tart world that still uses fresh blackberries brilliantly, our Pop Tart Ice Cream Sandwich is the most playful and crowd pleasing frozen treat on Step44 — perfect alongside a warm slice of this tart at any summer gathering. And if you love working with puff pastry in a show stopping format, our Puff Pastry Apple Roses Tarts use the same visual patience and glazing technique in a completely different flavor direction.
This recipe is also part of our complete French pastry recipes guide — 25 classic French desserts to master at home.
For the most detailed blackberry tart technique including the exact cornstarch to berry ratio and the buttery pastry shell method that the co founder of The Kitchn has been making from memory for years The Kitchn’s Foraged Berry Tart recipe is the most reliable and personal reference available developed by Sara Kate Gillingham on a California coastline with wild blackberries and good butter.
Buttery shell. Jammy filling. Glossy glaze. 4 tricks between you and the most beautiful summer tart you will pull from your oven this season. Scroll down — let’s get started.
What makes blackberry tarts so special?
There’s something magical about a warm blackberry tart filling your kitchen with sweet, rustic smells. It captures summer’s essence in every bite, blending sophistication with comfort. Making an easy blackberry tart is rewarding, whether you’re new or experienced, and it highlights seasonal fruit beautifully.
The unique flavor profile of blackberries
Blackberries are known for their deep, juicy taste that balances tartness and sweetness. This mix makes your dessert rich and never too sweet. When baked, the berries turn the crust a vibrant purple, adding to the tart’s beauty.
In places like the Pacific Northwest, blackberries are a prized find. They’re often picked from home gardens, ensuring they’re at their freshest. This is why a simple blackberry tart remains a beloved American classic.
Origin and history of blackberry tarts
Fruit tarts have a long history, but blackberry tarts hold a special place in American cooking. Families would gather wild berries to make pies and tarts. Using fresh ingredients from their gardens kept this tradition alive through the years.
Today, blackberry tarts continue to evolve while keeping their homemade charm. You can easily customize the recipe to fit your taste, making it a versatile addition to your baking collection. Here’s why blackberries are a favorite among bakers.
| Feature | Flavor impact | Texture |
|---|---|---|
| Fresh Blackberries | Bright and Tangy | Firm and Juicy |
| Baked Filling | Deep and Sweet | Soft and Jammy |
| Crust Pairing | Buttery Contrast | Crisp and Flaky |
Essential ingredients for a delicious blackberry tart
Choosing top notch ingredients can make your baking better. For a best blackberry tart recipe, the quality of each part matters. They help balance the tartness and sweetness.
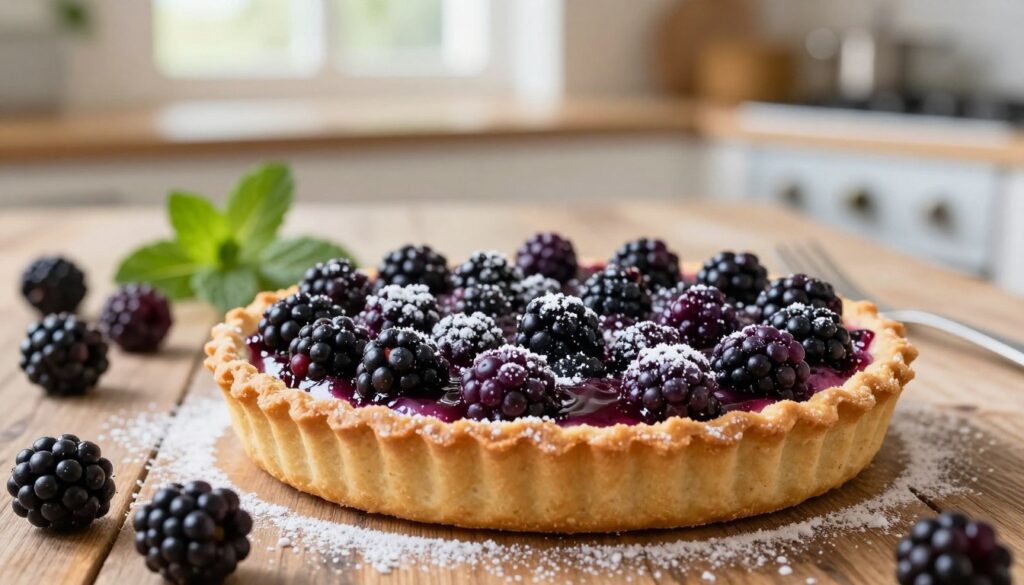
Fresh vs Frozen blackberries: what to choose?
Choosing between fresh and frozen berries depends on the season. Fresh blackberries give a firm texture and a tangy taste that’s perfect for a blackberry tart. But, frozen berries are picked at their peak and are available all year.
If you pick frozen, thaw and drain them well before baking. Too much water can make the crust soggy. Both fresh and frozen berries can work well if you handle them right.
Key ingredients for the crust
A good tart needs a flaky, buttery crust. You’ll need a few basic items for this:
- All purpose flour: It gives your dough structure.
- Cold unsalted butter: It makes the crust flaky.
- Granulated sugar: It adds a touch of sweetness.
- Ice water: It helps the dough come together without toughening it.
Optional add ins for extra flavor
Adding unique flavors can elevate your tart. White chocolate is a great choice because it enhances the blackberries’ sweetness. This mix creates a rich taste that will wow your guests.
| Ingredient category | Primary function | Pro tip |
|---|---|---|
| Blackberries | Main Flavor | Toss with cornstarch to thicken juices. |
| Butter | Texture | Keep it very cold for a flakier crust. |
| White Chocolate | Flavor Depth | Use high quality chips for better melting. |
| Sugar | Sweetness | Adjust based on berry tartness. |
Step by step guide to making the tart crust
A crisp, golden base is key to the best blackberry tart recipe. Making a professional looking crust is simpler than you think. Just follow these steps to ensure your tart stays sturdy and delicious.
Preparing your ingredients
First, chill all your ingredients before starting. Cold butter is essential for a flaky, tender pastry. It keeps the pastry perfect during baking.
- Use unsalted butter cut into small, uniform cubes.
- Measure your flour accurately using a kitchen scale for consistency.
- Keep your water ice cold to prevent the fat from melting too quickly.
Mixing and rolling out the dough
When mixing, pulse your ingredients until they just clump. Avoid overworking the dough to prevent a tough crust. Handle it as little as possible.
After chilling, roll the dough out on a lightly floured surface. Make it slightly larger than your pan. Carefully place the pastry in the tart tin and press it into the corners. Use a rolling pin to trim excess dough, creating a clean edge for your homemade blackberry tart.
Pre baking the crust
Pre baking, or blind baking, is essential to avoid a soggy bottom. It keeps the crust crisp, even after adding the fruit filling.
Line the pastry with parchment paper and fill it with pie weights or dried beans. Bake until the edges are lightly golden. Then, remove the weights to finish the base. These steps will help you achieve the best blackberry tart recipe every time.
Creating the perfect blackberry filling
A homemade blackberry tart is all about the filling. It needs to be vibrant and stable. The crust is the base, but the filling is where the magic is. Adding frangipane, a sweet almond cream, makes the tart moist and silky, perfect with fresh fruit.
How to prepare the blackberries
First, rinse your blackberries gently under cool water. Then, dry them completely with a paper towel to avoid a soggy crust. Always remove stems and leaves before starting.
Sweetening your filling: sugar options
Blackberries are tart, so they need a balance of sweetness. Use granulated sugar for a clean taste or brown sugar for a richer flavor. Adjust the sugar based on your berries’ ripeness for the best taste.
Thickening agents: flour vs Cornstarch
Choosing the right thickener is key for a dessert that’s easy to slice. Flour and cornstarch both work well, but they affect the texture and clarity differently.
| Thickener | Texture | Clarity |
|---|---|---|
| Cornstarch | Smooth and glossy | Clear |
| All Purpose Flour | Matte and soft | Opaque |
| Tapioca Starch | Very thick | Translucent |
Cornstarch makes the filling clear and professional looking, showing off the berries’ color. Flour gives a more rustic, homemade feel, keeping the fruit together while baking.
Assembling your blackberry tart
The assembly phase is where your culinary vision truly comes to life. It’s your chance to turn simple ingredients into a show stopping dessert. Learning how to make blackberry tart assembly will elevate your baking game.
Layering the filling on the crust
Start by spreading your prepared fruit mixture evenly across the pre baked crust. Use a silicone spatula to gently push the berries toward the edges without breaking the delicate pastry. Consistency is key to ensuring that every bite contains the perfect ratio of fruit to crust.
Tips for even distribution
To achieve a balanced flavor, avoid piling the berries too high in the center. Instead, spread them out so the filling sits at a uniform depth across the entire surface. This simple step ensures that your delicious blackberry tart recipe bakes evenly in the oven.
If you notice gaps in the filling, fill them with smaller berries or extra fruit pieces. A level surface prevents the edges from burning while the center remains undercooked. Taking a moment to smooth out the layer will result in a much more professional finish.
Decorative techniques to enhance appeal
For a truly stunning presentation, arrange your blackberries in a circular pattern starting from the outside and working your way in. This method creates a beautiful, professional look that highlights the natural beauty of the fruit. Visual appeal is just as important as taste when serving guests.
You can also alternate the direction of the berries to add texture and depth to the top of the tart. A light dusting of sugar or a few mint leaves after baking can further enhance the final aesthetic. Your guests will surely be impressed by the care you put into the presentation.
Baking your blackberry tart: timing matters
Getting the timing right in the oven is key to a great tart. A delicious blackberry tart recipe comes alive when baked correctly. The crust turns golden, and the fruit filling gets just right.
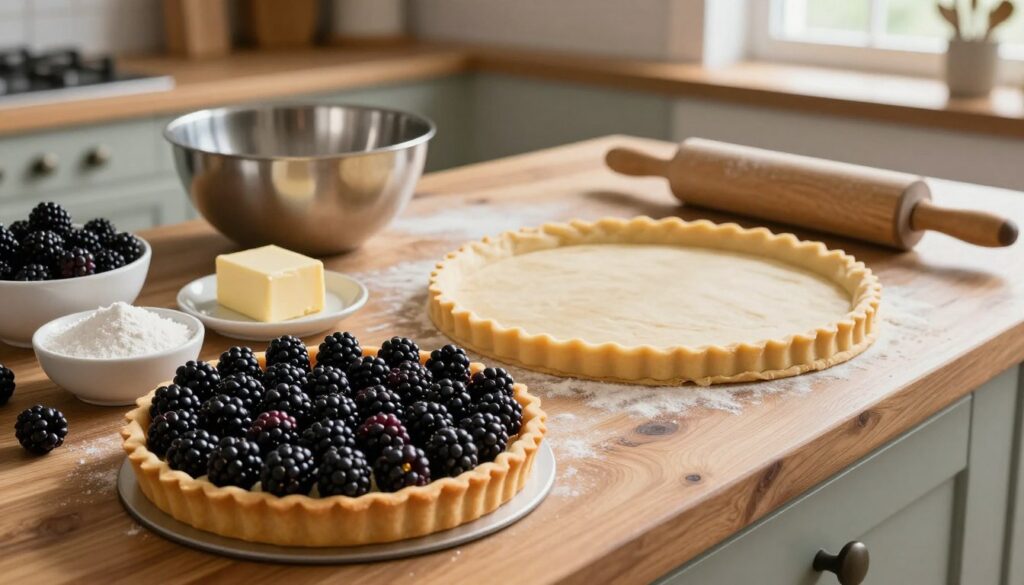
Optimal baking temperature
Preheat your oven to 350°F for the best results. This temperature helps the pastry bake evenly. Baking for about 42 minutes is perfect for a standard tart.
Remember, every oven is different. Start checking your tart a few minutes early to avoid overcooking. Consistent heat is essential for a flaky crust.
Checking for doneness
Trust your eyes and timer when making a blackberry tart. The crust should be golden, and the edges crisp. The filling should bubble slightly, showing it’s thickened.
Gently shake the pan to check the center. It should wobble slightly, not move like liquid. Remove it from the oven when you see these signs. Let it cool on a wire rack for the best slices.
Cooling and derving your tart
When your oven timer goes off, the real challenge starts. The smell of a fresh blackberry tart is amazing, but wait before you slice it.
Why cooling is important
Letting your dessert cool at room temperature is key for smooth slices. When it’s hot, the filling and crust are very delicate.
Quickly cutting into it might make the filling spill or the crust crumble. Waiting lets your fresh blackberry tart set properly, keeping it beautiful.
Serving suggestions for blackberry tart
Now that you’ve mastered how to make blackberry tart, think about what to serve with it. A few simple touches can make your dessert stand out.
Here are some great ways to serve your tart:
- A dollop of whipped cream with a hint of vanilla.
- A scoop of vanilla bean ice cream for a cool contrast.
- A dusting of powdered sugar for a bakery look.
- A sprig of fresh mint for color and freshness.
By following these tips on how to make blackberry tart service, you’ll impress your guests. These extra steps make all the difference in your dessert.
Storing leftover blackberry tart
Wondering how to keep your leftover tart fresh? The secret is in proper storage. This way, you can enjoy your fresh blackberry tart for days after baking. Just follow these easy steps to keep your dessert’s texture and taste perfect.
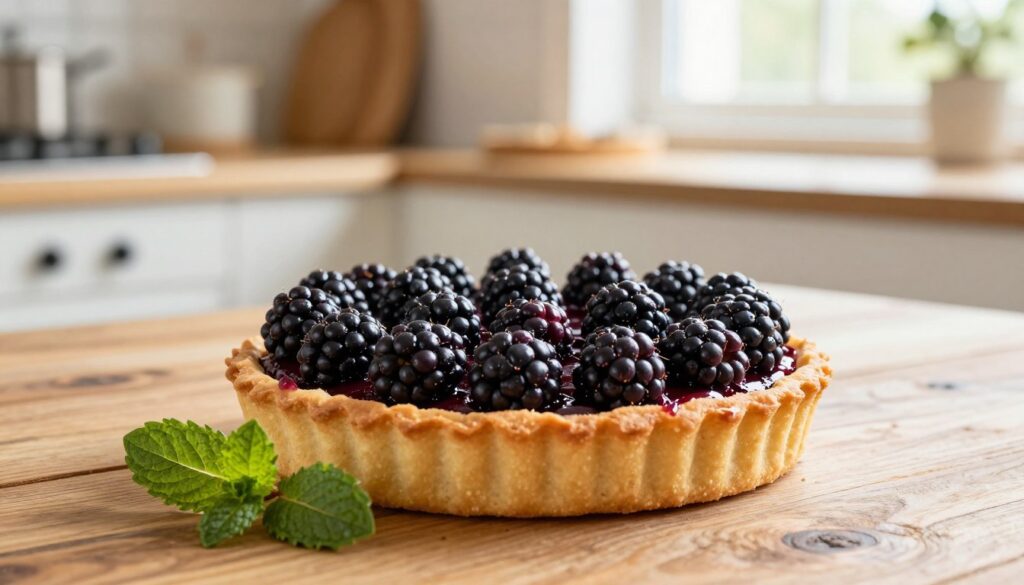
Best storage practices
Always use an airtight container to store your dessert. This keeps the crust from getting soggy or picking up smells. If you’re new to making how to make blackberry tart recipes, remember: a cool, dry place is key for keeping it fresh.
Freezing individual slices is a great idea if you have a lot left. It lets you enjoy summer flavors even in winter. Just wrap each slice in plastic wrap and put them in a freezer safe bag to avoid freezer burn.
How long does it last?
Knowing how long your dessert lasts helps you plan your snacks better. Here’s a quick guide to keep your treat fresh and tasty:
- Countertop: Best eaten within 24 hours if kept cool and dry.
- Refrigerator: Keeps well for 3 to 4 days in an airtight container.
- Freezer: Remains good for up to 2 months if wrapped right.
Always check for spoilage signs like color or texture changes before serving. By storing your tart right, you make sure your hard work stays a delightful treat for as long as it can.
Variations on the classic blackberry tart recipe
Customizing your baking lets you make every bite just right for you. You can change a few things to make a new dessert that’s also familiar and comforting.
Adding other fruits for a mixed tart
Adding fruits like raspberries or sliced peaches can make your dessert better. They add color and flavor that’s exciting to taste.
Try a blackberry tart with almond crust for extra richness. Crumbling marzipan into the filling adds a nutty sweetness that’s perfect with tart berries.
For a lighter touch, try these fruit mixes:
- Blackberries and fresh blueberries for a deep, antioxidant rich blend.
- Blackberries and tart Granny Smith apples for a crisp, balanced texture.
- Blackberries and sweet nectarines to highlight the summer harvest.
Vegan and gluten free options
Making a gluten free blackberry tart is easy. Just use a gluten free baking blend instead of wheat flour.
For vegans, use plant based margarine or coconut oil instead of butter. Make sure your sugar is vegan, and use flax egg or cornstarch to bind the filling.
Key substitutions for your dietary needs:
| Ingredient | Gluten free swap | Vegan swap |
|---|---|---|
| All Purpose Flour | GF Baking Blend | N/A |
| Butter | N/A | Plant based Butter |
| Egg Wash | N/A | Almond Milk |
These changes mean everyone can enjoy your tart. Your dessert will be a hit, no matter what diet they follow.
Final thoughts on this delightful dessert
Baking from scratch fills your kitchen with warmth and pride. It shows you value quality ingredients. Starting with simple recipes helps you become a confident baker.
Why you should try making it today
Try making a blackberry tart with almond crust to show off your skills. It’s a perfect mix of textures that will please anyone. For a lighter option, make a gluten free version that’s just as delicious.
Inviting friends to share the experience
Sharing food with loved ones makes it taste even better. Serve your tart with whipped cream or fresh berries for a fancy touch. These details make a simple snack into a special moment. Invite friends over and enjoy the fruits of your labor together.
FAQ
What is the best way to ensure my homemade blackberry tart doesn’t have a soggy bottom?
The secret to a crisp homemade blackberry tart is to par-bake your crust and use a thin layer of Ghirardelli white chocolate or almond cream as a moisture barrier before adding your fruit. This keeps the pastry snappy and delicious.
Can I make a gluten-free blackberry tart that is just as tasty?
Yes! To create a gluten-free blackberry tart, simply swap the all-purpose flour for a high-quality blend like King Arthur Measure for Measure. You will get that buttery, sturdy crust you desire without the gluten.
How do I choose between fresh or frozen berries for a delicious blackberry tart recipe?
While a fresh blackberry tart is unbeatable during the Oregon summer harvest, you can make an easy blackberry tart year-round using frozen berries. Just be sure to use them straight from the freezer to maintain the best consistency.
What makes the blackberry tart with almond crust so popular?
The blackberry tart with almond crust is a favorite because the nutty, sweet flavor of the almond (often from Odense Marzipan or frangipane) perfectly balances the natural acidity of the berries, creating the best blackberry tart recipe for those who love complex flavors.
Do you have any tips on how to make blackberry tart look like it came from a bakery?
For a professional look, arrange your fruit in tight, concentric circles starting from the outer edge. This ensures even distribution and a stunning visual for your fresh blackberry tart when you present it to guests.
How long should I bake the tart to get the perfect texture?
For a delicious blackberry tart, you should bake it at 350°F for about 42 minutes. You’ll know it’s done when the crust is a beautiful golden brown and the berry filling is bubbling and set.
Your email will not be published publicly.