
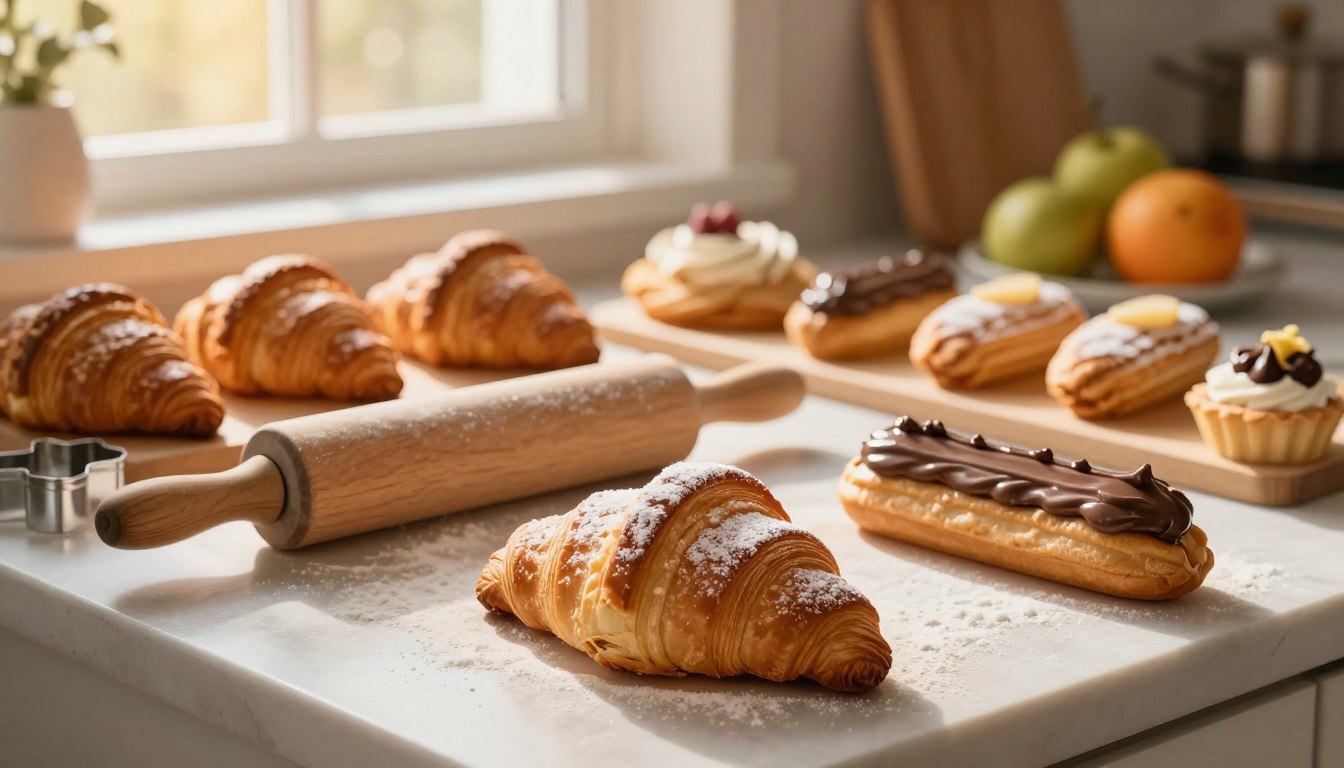
Easy and delicious french pastry recipes for beginners
Did you know that over 75% of people believe French pastry is too hard to make at home? The truth is far different. You can create bakery quality French pastry recipes in your own kitchen right now. All you need is the right guidance and a bit of practice.
French pastry baking feels intimidating at first glance. Those flaky croissants and delicate macarons seem like they belong only in professional bakeries. The reality is simple. Each recipe breaks down into small, manageable steps that anyone can follow. You don’t need years of training or special talents to succeed.
This guide takes you through French pastry recipes from start to finish. You’ll learn techniques that turn basic ingredients into something spectacular. Every step is clear and easy to understand. You’ll work with butter, flour, and eggs in new ways that will amaze you.
Your journey into French pastry recipes starts here. You’ll discover that baking these treats is not only possible but genuinely rewarding. Picture yourself serving homemade croissants to friends and family. Imagine their surprise when you tell them you made them yourself.
The recipes ahead include step by step instructions that work for everyone. You’ll find croissants, éclairs, tarts, and macarons all designed with you in mind. Each French pastry recipe focuses on clear directions and helpful tips. Mistakes become learning chances, not failures.
Get ready to transform your baking skills. Your kitchen will smell like a real French bakery soon. The satisfaction of pulling your own creations from the oven beats anything you can buy at a store. Let’s begin this delicious adventure together.
Introduction to french pastry: a culinary adventure
French pastries represent some of the world’s finest baked creations. Learning about these delicate treats opens doors to a rewarding baking journey. Understanding what makes traditional French pastries special helps you appreciate the craft before you start baking. This foundation prepares you to tackle recipes with confidence and skill.
French pastry has earned its reputation through centuries of refinement and dedication. Whether you’re interested in croissants, éclairs, or macarons, you’ll discover why French bakers are celebrated worldwide. Your adventure begins with understanding the principles that guide these beautiful creations.
What makes french pastry unique?
Traditional French pastries stand apart from other baked goods because of their precision and artistry. French pastry techniques focus on creating distinct textures that delight your taste buds. Think of the paper thin layers in a croissant or the light, airy center of an éclair. These results come from mastering specific methods passed down through generations.
French bakers prioritize quality over shortcuts. Your pastries will have crispy exteriors paired with tender insides. This balance requires patience and practice. The beauty lies in the details each fold, each temperature measurement, and each technique matters.
- French pastry recipes are the ultimate expression of culinary artistry elegant, precise and incredibly rewarding to master at home. According to Serious Eats, the foundations of French pastry lie in mastering a few essential techniques that unlock endless possibilities.
Begin your journey with our stunning :
- French macarons recipe how to make perfect treats
- Amazing banana nut bread recipe vegan
- Homemade pistachio chocolate croissant: 7 Irresistible steps
- Easy cookie recipes for kids perfect for baking together
both perfect first steps into the world of French patisserie!
Key ingredients in french pastries
Success in your baking starts with selecting the right ingredients. High quality European style butter forms the foundation of most traditional French pastries. This butter has a higher fat content, roughly 86% compared to standard American butter at 80%. The difference dramatically impacts your results.
- European style butter with higher fat content
- All purpose and cake flour for different textures
- Fresh eggs at room temperature
- Granulated and powdered sugar
- Almond flour for macarons and specialty treats
- Pure vanilla extract
- Quality chocolate for glazes and fillings
These ingredients work together to create the flavors and textures you expect from traditional French pastries. Investing in better ingredients pays off in every bite.
Essential tools you’ll need
Having the right equipment makes your baking experience smoother and more enjoyable. You don’t need to buy everything at once. Start with basics and add specialty items as you progress through different recipes.
| Tool Category | Essential Items | Why It Matters |
|---|---|---|
| Mixing & Measuring | Stand mixer, measuring cups, kitchen scale | Precision ensures consistent results in French pastry techniques |
| Rolling & Shaping | Rolling pin, pastry brush, piping bags with tips | Creates the layers and shapes that define traditional French pastries |
| Baking & Cooling | Baking sheets, parchment paper, wire racks | Proper air circulation develops perfect textures |
| Specialty Items | Tart pans, macaron mats, silicone molds | Needed for specific pastry shapes and designs |
A quality kitchen scale deserves special mention. Baking works best when you measure by weight rather than volume. This precision defines professional French pastry techniques and eliminates guesswork from your recipes.
Start your French pastry adventure with confidence. You now understand what sets these creations apart and what you’ll need to succeed. Your next step involves mastering the techniques that bring these beautiful pastries to life.
Mastering puff pastry: a beginner’s guide
Puff pastry stands as one of the most versatile foundations in creating homemade French pastries. You might think making puff pastry from scratch is impossible, but the truth is much simpler. The good news is that you can purchase pre made puff pastry from grocery stores like Whole Foods or your local bakery. This shortcut still delivers impressive results without hours of work. Learning to work with puff pastry opens doors to countless delicious creations that will impress your family and friends.

Simple techniques for puff pastry
Understanding puff pastry starts with knowing how it gets its signature texture. The magic comes from a process called laminating. This means folding butter into dough repeatedly to create hundreds of thin, flaky layers.
Here are the key techniques you need:
- Keep everything cold your butter, dough, and work surface
- Fold the dough carefully to create even layers
- Chill between folds to prevent the butter from melting
- Roll evenly so layers bake uniformly
- Prick the dough with a fork to prevent puffing too much
Making your own puff pastry requires patience rather than special skills. The process takes time, but each step is straightforward. If you choose to buy premade puff pastry, you skip the labor while still creating bakery quality homemade French pastries.
Classic uses of puff pastry
Your puff pastry becomes the foundation for countless treats. Consider these popular options:
| Pastry type | Description | Difficulty level |
|---|---|---|
| Palmiers | Sweet spiral cookies with a crispy, caramelized exterior | Beginner |
| Tarte Tatin | Upside down apple tart with caramelized fruit | Intermediate |
| Napoleon Cake | Layered pastry with cream and chocolate glaze | Intermediate |
| Vol au vents | Small cups filled with savory or sweet fillings | Beginner |
| Cheese Straws | Crispy, savory sticks perfect for appetizers | Beginner |
Each of these recipes showcases what puff pastry can do. Starting with simpler options like cheese straws builds your confidence before tackling more complex creations.
Storage tips for puff pastry
Proper storage keeps your puff pastry fresh and ready to use. Here’s what you need to know:
- Refrigerator storage: Wrap your puff pastry tightly in plastic wrap and store for up to two days
- Freezer storage: Frozen puff pastry lasts three months when wrapped properly
- Thawing: Move frozen pastry to the refrigerator overnight before using
- Baked pastries: Keep finished homemade French pastries in airtight containers for one to two days
- Crispy texture: Avoid storing baked puff pastry in humid environments, as moisture affects crispiness
Baked puff pastry items taste best when eaten fresh. The layers lose their crispness over time, so enjoy your creations as soon as possible after baking. With these storage methods, you’ll always have quality puff pastry available for your baking adventures.
Irresistible croissant recipes to try
Croissants stand as one of the most iconic symbols of French baking. While they may seem intimidating, easy French pastry recipes like croissants are more achievable than you might think. You’ll discover that traditional methods and faster alternatives both produce delicious, flaky results. Whether you choose the classic laminating technique or a simplified pie crust method, you can create bakery quality croissants in your own kitchen. Most of the time involved is hands off resting, making these easy French pastry recipes perfect for your baking schedule.
Classic butter croissants
Start your croissant journey with the classic butter version. You’ll begin by preparing a simple dough, then incorporate cold butter through lamination. This creates those signature flaky layers that make croissants so special.
The process involves folding your dough multiple times to distribute the butter evenly. You can also use a faster pie-crust technique by cutting large chunks of cold butter directly into your flour, which skips traditional laminating but still delivers excellent results.
Shape your dough into triangles, roll them into crescents, and let them proof. Apply an egg wash for that beautiful golden-brown finish. The final step is baking until your croissants reach perfection.
Almond croissants: a sweet twist
Transform day old croissants into something extraordinary with almond filling. Split your croissants horizontally and fill them with almond cream, known as frangipane. This approach works wonderfully for croissants that have lost their initial crispness.
Top your filled croissants with sliced almonds and a dusting of powdered sugar. Bake them until the almond cream sets and the tops turn golden. You’ll create an indulgent treat that feels restaurant-quality yet simple to make.
Tips for perfect croissants
Success with easy French pastry recipes depends on several key factors:
- Keep your butter and dough at the correct temperature throughout the process
- Work in a cool kitchen to prevent butter from melting into the dough
- Make clean, sharp cuts when slicing your dough into triangles
- Allow proper proofing time for your shaped croissants to rise
- Use an egg wash to create that signature shiny, golden appearance
Pain au chocolat (chocolate croissants) uses the same dough with chocolate batons tucked inside before rolling. This variation offers a rewarding baking project where much of the time is hands-off waiting, not active work.
Decadent eclair recipes: sweet and creamy delight
Éclairs stand out as one of the most elegant authentic French pastry desserts you can make at home. These long, slender pastries feature crispy choux shells filled with smooth pastry cream and topped with glossy chocolate glaze. While they look fancy, éclairs are surprisingly simple once you master the basic technique. You will discover that creating these treats becomes easier with practice and patience.
Basics of making eclairs
The foundation of authentic French pastry desserts starts with pâte à choux, a special dough made from four simple ingredients. You combine butter, water, flour, and eggs to create a smooth paste that puffs up dramatically during baking. This dough becomes your éclair shell.
Follow these steps to prepare your choux pastry:
- Heat water and butter together until the butter melts
- Remove from heat and stir in flour until smooth
- Cool the mixture slightly, then beat in eggs one at a time
- Transfer the dough to a pastry bag with a large round tip
- Pipe 4 inch lines onto your baking sheet
- Bake at 400°F for 35-40 minutes until golden and dry
The drying process is crucial. Your shells must bake completely dry, or they will collapse when cooling. Once baked, you can create a small opening by poking holes in the bottom or slicing them horizontally to add your filling.
Flavor variations for your eclairs
Classic vanilla and chocolate eclairs taste wonderful, yet you can explore many exciting flavors. Modern authentic French pastry desserts offer endless possibilities for creative combinations.
| Filling flavor | Topping choice | Difficulty level |
|---|---|---|
| Vanilla Bean Pastry Cream | Chocolate Ganache | Beginner |
| Coffee Flavored Cream | Coffee Icing | Beginner |
| Pistachio Cream | Pistachio Glaze | Intermediate |
| Salted Caramel Filling | Caramel Drizzle | Intermediate |
| Raspberry Cream | White Chocolate Coating | Intermediate |
| Lemon Curd Filling | Lemon Glaze | Advanced |
Your filling should be smooth pastry cream, also called crème pâtissière. This rich custard base pairs beautifully with any flavor you choose. Use a pastry bag to pipe the filling into your prepared shells carefully and evenly.
Perfecting the chocolate glaze
The finishing touch separates good éclairs from bakery quality authentic French pastry desserts. A smooth, glossy chocolate glaze requires proper technique and the right consistency.
Create your glaze using these ingredients:
- Combine 4 ounces of chopped dark chocolate with 2 tablespoons of butter
- Heat heavy cream until it steams but does not boil
- Pour the hot cream over the chocolate and butter
- Wait 30 seconds, then stir until completely smooth
- Let the mixture cool to room temperature before dipping
Your glaze should coat the back of a spoon without running off immediately. If it seems too thick, add cream one teaspoon at a time. If too thin, let it sit longer to set up. Dip the top of each filled éclair into the glaze and allow excess to drip off before placing on a serving plate.
Store your finished éclairs in the refrigerator for up to two days. Serve them chilled for the best texture and taste.
Tasty tart recipes you can easily make
French tarts represent some of the most stunning and delicious desserts you can bake at home. These elegant treats showcase popular French pastry flavors that range from bright citrus notes to rich chocolate indulgence. The best part? You don’t need advanced baking skills to create these bakery quality tarts. Each recipe builds on techniques you’ve learned with puff pastry and pâté à choux, making your baking journey feel natural and rewarding.
Tarts offer incredible versatility for your kitchen adventures. Whether you prefer fruit forward designs or decadent chocolate creations, there’s a tart recipe perfect for your taste. Let’s explore some accessible options that will impress your family and friends.
Classic french fruit tart
The French fruit tart (tarte aux fruits) features a buttery shortbread style crust that you press directly into your pan. This approach eliminates rolling and fitting dough, reducing stress from your baking day. The crust uses simple ingredients: flour, butter, sugar, and eggs mixed until they form a dough you can press with your fingers.
Your filling combines mascarpone cheese with a touch of powdered sugar for a light, slightly tangy base. Fresh fruit arranges beautifully on top in patterns that look impressive. Brush your finished tart with apricot preserve glaze for shine and subtle flavor.
Want to explore variations? Try an apple tart where macerated apple slices become jammy in the oven, or use store-bought puff pastry for a French apple tart ready in under an hour, finished with a Grand Marnier glaze.
Chocolate tart: rich and indulgent
A chocolate tart delivers one of the most beloved popular French pastry flavors. This dessert features a silky ganache filling that sets to perfect consistency not too firm, not too soft. Your chocolate filling needs just three ingredients: quality chocolate, heavy cream, and butter.
The magic happens when you heat the cream until steaming, pour it over chopped chocolate, and let it sit for one minute before stirring. This creates that signature smooth, glossy finish. Some bakers add a touch of vanilla or sea salt to enhance the chocolate flavor.
Lemon tart (tarte au citron) offers a bright, tangy contrast to chocolate options. Its sharp, refreshing filling balances sweetness perfectly with zesty citrus notes.
Tips for flaky crusts
Achieving tender, flaky tart shells requires attention to detail. Follow these essential guidelines:
- Keep all your ingredients cold butter, eggs, and even your mixing bowl
- Avoid overworking your dough, which develops gluten and makes crusts tough
- Blind bake your crust when using wet fillings to prevent soggy bottoms
- Use pie weights or dried beans during pre baking to keep the shell flat
- Let your dough rest in the refrigerator for at least 30 minutes before baking
These techniques ensure every bite of your homemade tart offers that desirable flaky texture you love from French bakeries.
Exploring traditional french macarons
French macarons stand as one of the most iconic classic French pastry dishes that bakers love to master. These delicate, colorful treats feature crisp, shiny shells that sandwich luscious, rich fillings. While macarons have a reputation for being technically challenging and finicky, don’t let that intimidate you. By following proper techniques and tips, you can turn out beautiful macarons every single time.

Basic macaron recipe
Creating macarons begins with understanding the essential steps. You’ll need to prepare your dry ingredients by sifting almond flour and powdered sugar together. This combination forms the base of your macaron shells.
Next, you’ll make a meringue using egg whites and granulated sugar. The meringue must reach stiff peaks for the best results. The crucial part comes when you fold the dry ingredients into your meringue using the macaronage technique. This folding process creates the signature smooth batter that produces those perfect shells.
Once your batter is ready, pipe small circles onto parchment lined baking sheets. The piping creates the foundation for your macarons’ appearance and shape.
Perfecting the macaron technique
Getting your macarons just right requires attention to detail. Here are key tips for success:
- Age your egg whites for 24 hours before using them
- Achieve the right batter consistency during macaronage it should flow like lava
- Let your piped macarons rest until they form a skin on top
- Bake at the correct temperature, typically 300-325°F
- Allow shells to cool completely before removing from parchment
Common challenges include cracked shells, missing feet, hollow interiors, or lopsided shapes. Each issue has a specific solution. Cracks usually mean your oven temperature is too high. Missing feet indicate your batter needs more folding. Hollow shells suggest under baking.
Flavor ideas for creative macarons
Classic French pastry dishes like macarons offer endless flavor possibilities. Start with traditional options to build confidence:
| Classic flavors | Adventurous combinations | Filling type |
|---|---|---|
| Vanilla | Salted Caramel | Buttercream |
| Chocolate | Lavender Honey | Ganache |
| Raspberry | Rose | Fruit Curd |
| Pistachio | Matcha Green Tea | Buttercream |
| Lemon | Coffee Espresso | Ganache |
You can incorporate flavors using extracts, food coloring, and various fillings. Buttercream works beautifully with most flavor combinations. Ganache creates a luxurious texture that pairs well with chocolate and coffee varieties. Fruit curds bring brightness to your macarons.
Begin your macaron journey with simple vanilla or chocolate versions. Once you feel confident with your technique, explore adventurous flavors that make your creations unique and special.
Flaky and delicious galette recipes
Galettes are rustic French pastries that celebrate imperfection and simplicity. Unlike traditional tarts that require precise pan work, galettes embrace a free form style that works perfectly for beginners. You’ll find that these open faced pastries forgiving and fun to make. The beauty of a galette lies in its casual appearance. Wrinkled edges and uneven shapes add to its charm rather than detract from it. Whether you prefer sweet or savory versions, galettes deliver impressive results with minimal stress.
These pastries come from the French countryside tradition of home baking. You can create them with basic pantry ingredients and simple techniques. Best of all, galettes look elegant on your table even when made in your own kitchen.
Rustic apple galette
An apple galette starts with a simple butter-based pastry dough that you can make from scratch. Roll your dough into a rough circle about one eighth inch thick. You don’t need perfect precision here. Arrange thinly sliced apples in the center of your dough circle, leaving about two inches around the edges.
Fold the pastry edges up and over the apples to create that signature rustic border. Your galette should look casually folded, not perfectly pleated. Brush the dough with egg wash for a beautiful golden color. Sprinkle the apples with cinnamon and sugar if you like extra sweetness.
Bake your galette at 400°F for about 35 to 40 minutes. The pastry will turn golden brown. The apples will caramelize at their edges and release their juices. Some liquid will bubble up around the edges. This is exactly what you want. Once cool enough to handle, serve your galette warm with vanilla ice cream.
Savory vegetable galette
Savory galettes make excellent appetizers or light lunch meals. You follow the same simple folding technique as sweet versions. The difference comes in your filling choices and toppings.
Popular combinations include:
- Tomato and goat cheese with fresh basil
- Zucchini and gruyère with garlic
- Caramelized onion and thyme
- Mushroom and fontina with rosemary
For a tomato and goat cheese galette, slice ripe tomatoes thinly and pat them dry with paper towels. Layer them on your dough with crumbled goat cheese. Add fresh herbs like basil or thyme. Brush your pastry edges with egg wash as you would for a sweet version. Bake until the pastry is golden and crispy. Finish with a pinch of coarse sea salt rather than sugar.
Tips for making the perfect galette
Success with galettes comes down to a few key techniques that keep things simple.
| Technique | Why it matters | How to do it |
|---|---|---|
| Keep Dough Cold | Ensures flaky texture and easier handling | Chill dough for at least 30 minutes before rolling |
| Roll Roughly | Maintains rustic charm and reduces stress | Create an uneven circle about one-eighth inch thick |
| Adequate Border | Allows room to fold over filling securely | Leave two inches of dough around your filling |
| Egg Wash Application | Creates beautiful golden brown color | Brush dough edges with beaten egg before baking |
| Proper Toppings | Adds flavor without weighing down pastry | Use sugar for sweet, coarse salt for savory versions |
Prevent a soggy bottom by partially baking your dough shell for five minutes before adding fillings. This creates a barrier that keeps moisture from soaking the pastry. Pat your fillings dry before assembling. Excess moisture from vegetables or fruits can make your base wet and soft rather than crispy.
Consider making Galette des Rois, the traditional French king cake. This version uses puff pastry sheets filled with almond frangipane and jam. Score beautiful patterns into the pastry surface before baking. Egg wash gives it a gorgeous golden finish. The combination of buttery pastry, sweet almond filling, and fruity jam creates something truly special.
Remember that galettes are meant to look homemade and rustic. Your uneven folds and casual presentation are features, not flaws. Each galette you create will be uniquely yours and absolutely delicious.
Creamy and rich pâté à choux
Pâté à choux is a magical dough that transforms into airy, hollow pastries perfect for filling with sweet or savory ingredients. Despite its fancy French name, this versatile pastry dough is surprisingly straightforward to make. You’ll discover that mastering this technique opens doors to creating impressive desserts and appetizers that will impress your family and friends.

Understanding pâté à choux
The magic of pâté à choux comes from simple ingredients working together in a special way. You start by cooking flour with butter and water on the stovetop, creating a paste. This step is essential because it cooks out the raw flour taste and helps develop the right texture.
Eggs are the star ingredient that makes everything work. When you add eggs one at a time, they provide structure and moisture. The goal is to achieve a smooth, glossy dough that falls slowly from a spoon in a V-shape. During baking, steam from the eggs causes the dramatic puffing that creates those hollow centers.
Sweet and savory uses
Your pâté à choux can become endless creations:
- Profiteroles (little ice cream filled puffs topped with melted chocolate)
- Cream puffs filled with pastry cream or whipped cream
- Éclairs with chocolate glaze
- Croquembouche (a tower of cream puffs)
- Paris Brest (a ring shaped pastry with praline cream)
- Gougères (cheese puffs as elegant appetizers)
Profiteroles are particularly impressive because they look fancy yet remain surprisingly easy to make. These little chocolate covered puffs filled with ice cream make a stunning dessert.
Essential tips for success
Your choux pastry success depends on following these important guidelines:
- Cook the dough long enough to eliminate the raw flour taste and allow moisture to evaporate
- Add eggs gradually and test consistency as you go the dough should be smooth and glossy
- Pipe uniform shapes so everything bakes evenly
- Bake until completely dry and golden brown; removing too early causes collapse
- Resist opening the oven door during baking to avoid disturbing the rising pastry
When your pâté à choux emerges from the oven, you’ll have perfectly puffed pastries ready for your favorite fillings. Practice these techniques, and you’ll create bakery quality pastries at home.
Easy tarte tatin: upside down delight
Tarte Tatin stands as one of the most impressive French desserts you can create at home. This upside down caramelized apple tart looks dramatic but follows a straightforward technique that becomes easier with practice. The magic happens when you flip the pastry onto a plate, revealing a gorgeous layer of glossy, caramelized fruit on top. Building on the pastry skills you’ve learned in earlier sections, this recipe brings everything together in a stunning presentation that will wow your family and friends.
Classic recipe for tarte tatin
Start by making your caramel in an oven safe skillet. The key to success lies in going low and slow with your sugar. Resist the urge to stir constantly, as this causes crystallization and ruins your caramel. Watch carefully as the sugar melts around the edges and turns that perfect amber color.
Once your caramel reaches the right shade, arrange your apple halves or quarters in a beautiful pattern over the caramel. The fruit will soften and nestle into the caramel as it bakes. Top everything with a round of puff pastry and tuck the edges down into the skillet. Bake until your pastry turns golden and the apples become tender.
The dramatic moment arrives when you flip the tart onto your serving plate. The caramelized apples now sit on top, creating that signature upside down look.
Variations on the traditional tarte tatin
You don’t need to stick with apples. Try these delicious alternatives:
- Pear tarte Tatin for a softer, more delicate flavor
- Peach or apricot versions during summer months
- Pineapple tarte Tatin for a tropical twist
- Savory versions using tomatoes and onions for dinner
Different fruits need slight adjustments. Softer fruits like peaches require less cooking time than apples. You might also need to adjust your sugar quantity depending on the fruit’s natural sweetness.
Serving suggestions
Serve your tarte Tatin warm, not hot, for the best flavor and texture. This timing lets the caramel set slightly without becoming hard. Pair your tart with:
- Vanilla ice cream for a classic combination
- Crème fraîche for a tangy contrast
- Whipped cream for elegant simplicity
Present your tarte Tatin at the table for maximum impact. Your guests will love seeing this beautiful dessert before you serve it. Leftovers can be reheated gently in a low oven and taste delicious for the next day or two.
Hosting a french pastry party: tips and tricks
You’ve learned to bake croissants, éclairs, and macarons. Now it’s time to share your creations with friends and family. Hosting a French pastry party brings together all your baking skills in one memorable celebration. This guide helps you plan, prepare, and present an impressive spread that showcases your talents. From selecting the right pastries to arranging them beautifully, you’ll create an elegant experience your guests won’t forget.

Planning your menu
Creating a balanced pastry menu requires variety in flavors, textures, and difficulty levels. You want some items that are make ahead friendly, like macarons and tart shells, paired with fresh baked croissants and palmiers. Palmiers pair wonderfully with tea or coffee and work as an anytime treat.
Plan for 2-3 pastries per person at a dessert party. Consider pairing your pastries with appropriate beverages. Light items like madeleines complement champagne or sparkling wine beautifully. Consult your best French pastry cookbook to discover which pastries work best together and how to time your baking schedule.
- Make ahead items: macarons, tart shells, galettes
- Fresh baked items: croissants, palmiers, éclairs
- Beverage pairings: tea, coffee, champagne, wine
- Quantity guide: 2-3 pastries per guest
Essential cooking tools and equipment
Success depends on having the right equipment at your fingertips. Invest in multiple baking sheets for simultaneous baking and cooling racks to prevent soggy bottoms. Various piping tips and bags let you create different shapes and designs.
Tart pans in different sizes expand your recipe options. Serving platters, tiered cake stands, and cake domes elevate your presentation. Your best French pastry cookbook should guide you toward quality tools that make baking easier and more enjoyable.
| Equipment type | Quantity needed | Purpose |
|---|---|---|
| Baking Sheets | 3-4 | Batch baking pastries simultaneously |
| Cooling Racks | 2-3 | Preventing condensation on pastries |
| Piping Bags and Tips | 5-8 bags with varied tips | Creating decorative shapes and details |
| Tart Pans | 2-3 different sizes | Making various tart recipes |
| Cake Stands | 2-3 tiered stands | Creating height and visual interest |
| Serving Platters | 2-4 | Organizing pastries by type |
| Cake Domes | 1-2 | Showcasing special pastries |
Presentation ideas for your pastries
Your presentation transforms ordinary pastries into an elegant display. Arrange pastries on tiered stands to create visual height and interest. Use cake domes to showcase your showstopper items like macarons or decorated éclairs.
Add fresh flowers or greenery around your display for color contrast. Small cards labeling each pastry type help guests understand what they’re tasting. Create a color-coordinated arrangement that guides the eye naturally across your table. These touches elevate even simple pastries into a sophisticated experience.
- Arrange pastries on tiered stands for dramatic height
- Use cake domes to protect and showcase special items
- Incorporate fresh flowers or greenery for decoration
- Label each pastry with small informational cards
- Create a color coordinated display scheme
- Leave space between items for visual breathing room
Conclusion: embracing the art of french pastry
You have traveled through the world of French pastry baking. You learned how to work with puff pastry and master the lamination technique for perfect croissants. You discovered how to pipe pâte à choux for éclairs and profiteroles. You practiced creating delicate macarons with their smooth shells and creamy centers. You also explored rustic galettes, elegant tarts, and the magic of tarte Tatin. Each recipe built upon the skills you gained before. The techniques you learned form the foundation of French pastry baking. Your hands now understand the feel of properly laminated dough and the right texture of pastry cream.
Recap of key techniques and recipes
The journey through French pastry started with understanding your ingredients and tools. You learned why butter quality matters for laminated doughs. You practiced folding and chilling to create flaky layers. You worked with croissants, which demand patience and skill. You created éclairs with chocolate glazes that shine. You assembled tarts with beautiful fruit arrangements. You piped macarons with precision. You shaped galettes with their charming rustic appeal. You flipped tarte Tatin to reveal caramelized apples. These recipes share common techniques that overlap and strengthen each other.
Encouragement to experiment and create
Now comes the fun part making these recipes your own. Try mixing flavors in your macarons like pistachio with lavender or rose. Swap the fruit in your tarts based on what is fresh and available. Add spices to your croissant dough or fill them with savory ingredients. Do not worry about perfect results. Professional bakers started exactly where you are now. Your mistakes teach you more than your successes. Share what you bake with family and friends. Their smiles will fuel your desire to keep improving. The real joy comes from the quiet time you spend mixing, folding, and shaping. Baking French pastries is a form of art that soothes your mind while creating beauty.
Resources for further learning
Your learning does not stop here. Pick up a copy of “Mastering the Art of French Cooking” or “The Flavor Bible” for inspiration. Watch video tutorials on platforms like YouTube from bakers who break down techniques step by step. Look for local baking classes through culinary schools or community centers in your area. Join online baking communities where you can share photos and ask questions. Follow pastry blogs that focus on French techniques. Visit specialty stores like Williams Sonoma or Sur La Table for hard to find ingredients and equipment. Connect with other bakers who share your passion. Keep practicing, keep learning, and keep creating. The world of French pastry is rich and endless.
Your email will not be published publicly.