
Fruit Shaped Pastries: The Ultimate Guide to Realistic and Luxury Desserts
Fruit shaped pastries are without question one of the most breathtaking trends to emerge from the modern pastry world and once you understand what goes into making them, it is not difficult to see why the entire baking community fell head over heels for them.
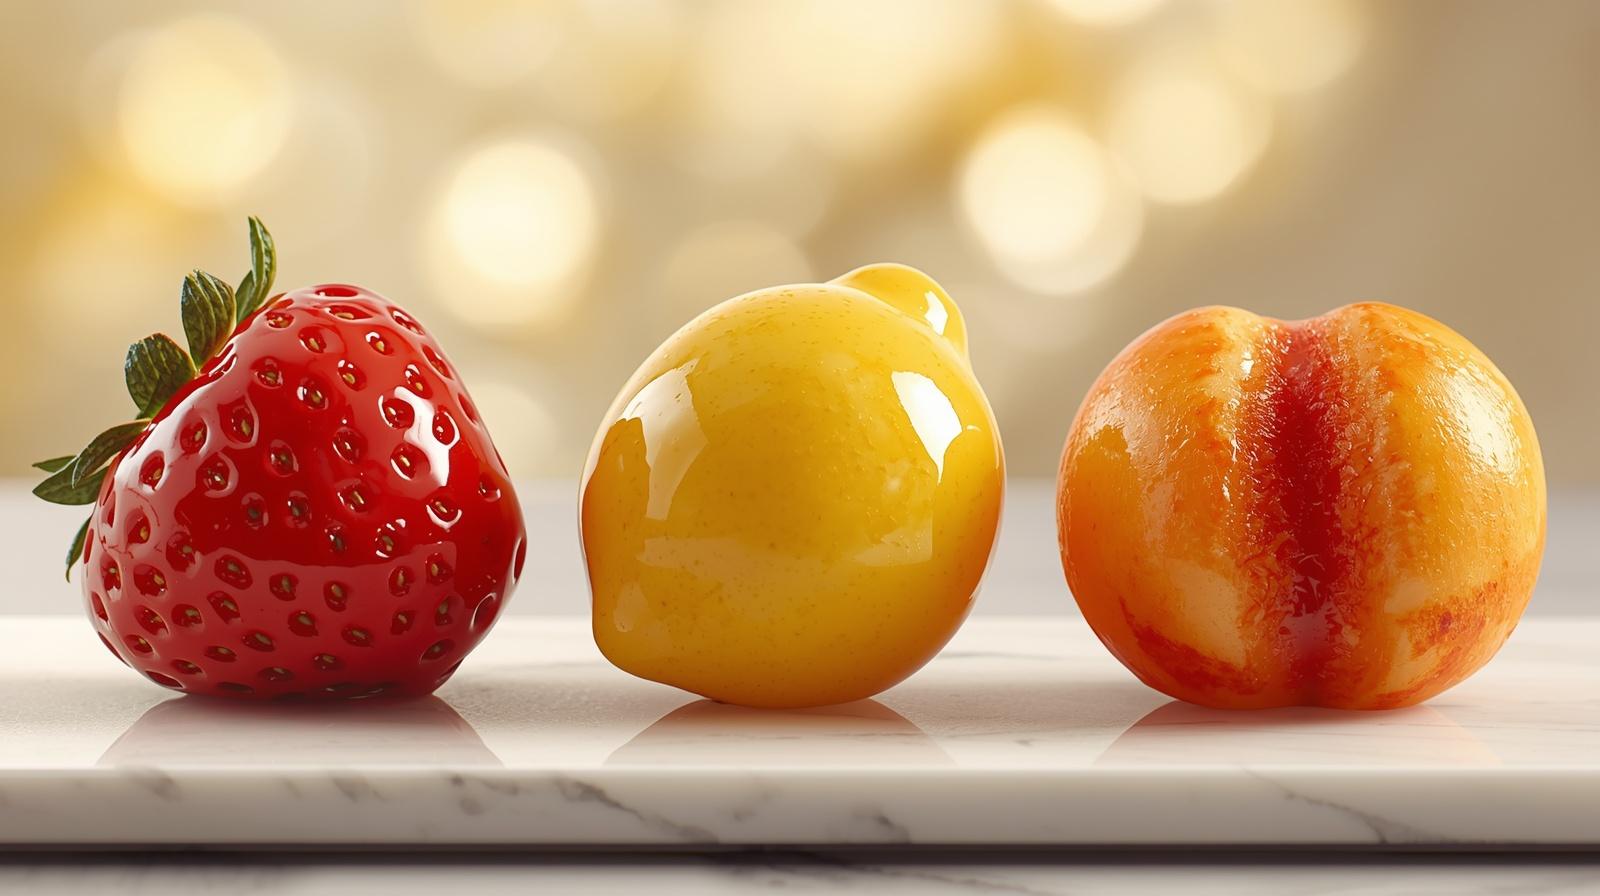
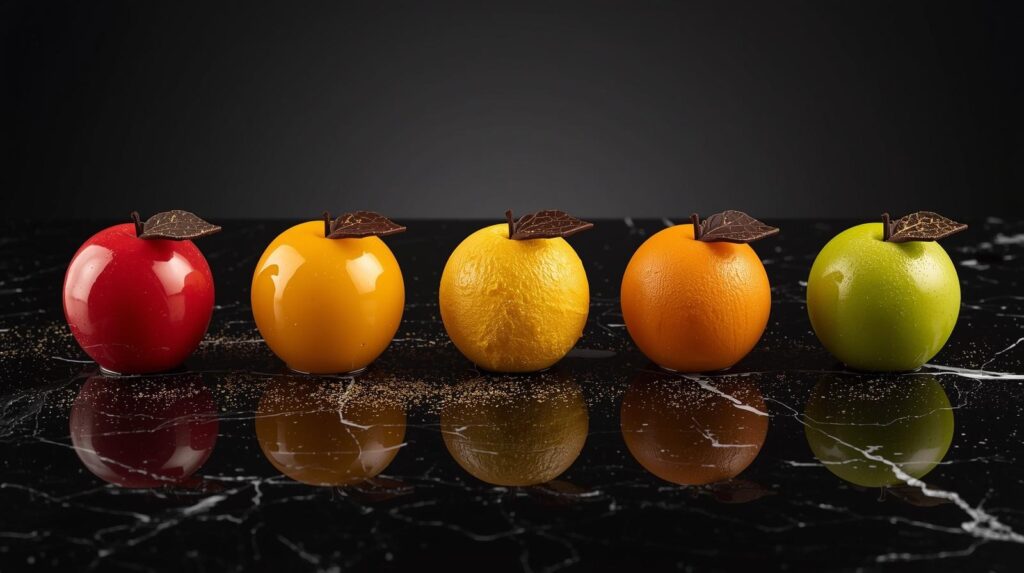
These stunning desserts are crafted with extraordinary precision to look exactly like real fruits sitting naturally in a bowl. From glossy strawberries with their characteristic dimpled surface to velvety soft peaches dusted with the faintest blush of color and bright vibrant lemons that practically glow every detail is intentional, every finish deliberate.
What makes fruit shaped pastries truly special is not just the visual illusion they create. It is the remarkable harmony between artistry and flavor that happens inside. Classic ingredients mousse, sponge, fruit compote, gelatin are layered and assembled with such care and technique that the result is simultaneously a refined dessert experience and a genuine work of edible art.
Whether you are a professional pastry chef looking to expand your repertoire, a dedicated home baker ready for your most ambitious project yet, or simply someone who fell in love with fruit shaped pastries scrolling through social media at midnight, this guide was written for you.
Here you will find everything the exact ingredients, the step by step preparation, how to make a flawless mirror glaze, how to achieve realistic fruit colors, and how to style your finished pastries for photography that does them full justice.
What Are Fruit Shaped Pastries?
Have you ever seen a dessert so convincingly realistic that you genuinely reached out to pick up what you thought was a fresh piece of fruit? That moment of delightful confusion is exactly what fruit shaped pastries are designed to create and it never gets old.
These extraordinary little creations are crafted to mimic the appearance, texture, and color of real fruits with such precision that even experienced pastry lovers do a double take. Beneath that flawless exterior hides something far more exciting tender layers of mousse, delicate sponge cake, vibrant fruit compote, and a glossy mirror glaze or velvety spray finish that brings the whole illusion to life.
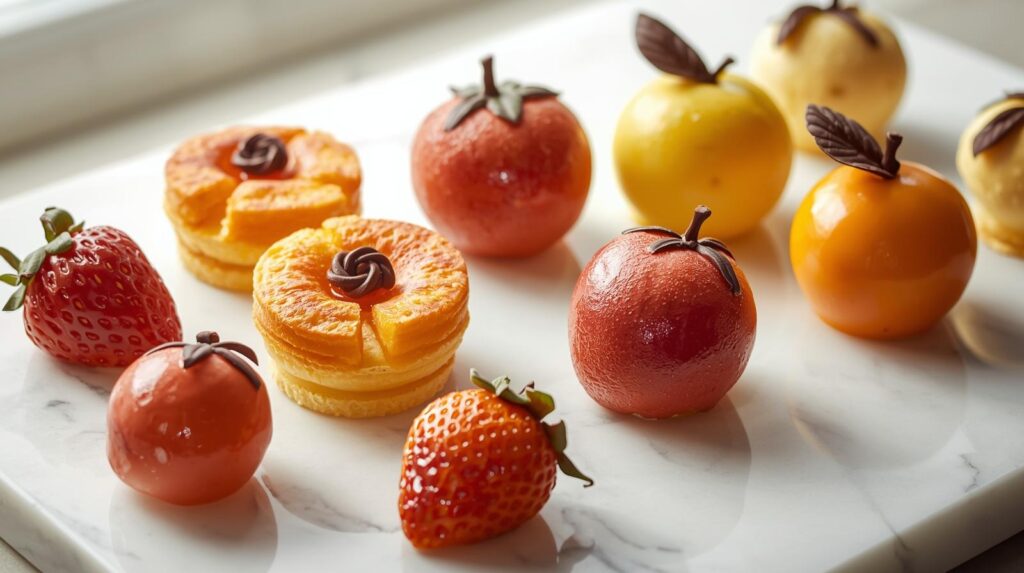
This style of pastry making first captured the world’s imagination through the work of visionary chefs like Cédric Grolet, whose fruit inspired creations at his Paris boutique transformed simple desserts into luxury edible sculptures. What was once a niche fine dining concept has since become one of the most admired and widely searched pastry trends across social media, professional kitchens, and home baking communities around the world.
Bite into what looks like a perfectly ripe strawberry or sun kissed peach, and you discover something extraordinary inside balanced layers of sweet, tart, creamy, and fresh flavors that make the experience as satisfying as it is surprising.
Fruit Shaped Pastries Recipe
Before you begin, gather everything you need. Working with all your ingredients measured and ready makes the process significantly smoother and far more enjoyable.
For the sponge base:
- 2 eggs
- 60g sugar
- 60g flour
- 20g melted butter
For the fruit insert:
- 150g fresh fruit puree strawberry, mango, lemon, or any favorite
- 30g sugar
- 5g hydrated gelatin
For the mousse:
- 250ml heavy cream
- 200g fruit puree
- 60g sugar
- 8g hydrated gelatin
For the mirror glaze:
- 100g sugar
- 100g glucose syrup
- 50ml water
- 100g white chocolate
- 60ml condensed milk
- 8g gelatin
- Natural food coloring in your chosen fruit tone
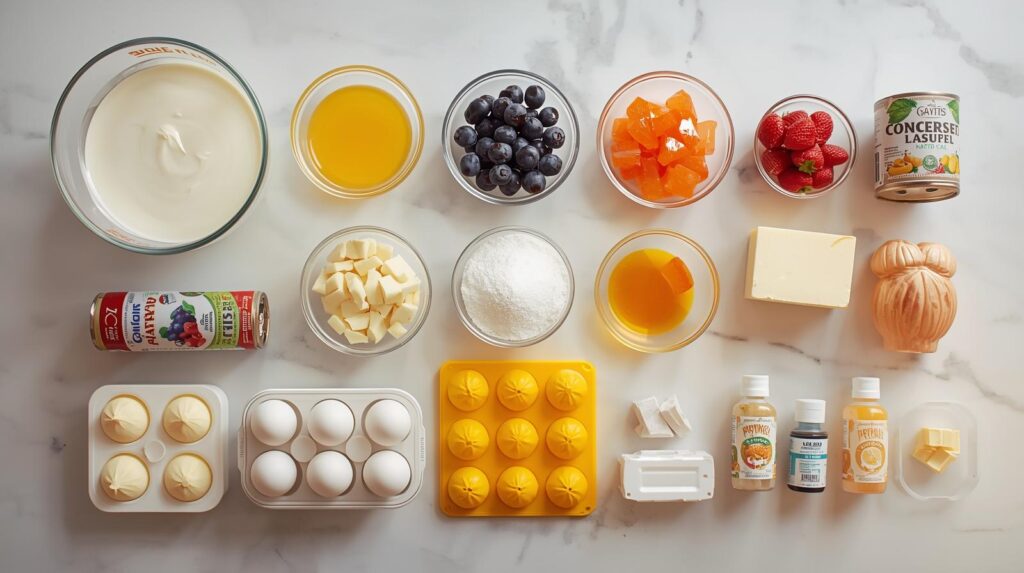
Optional finishing touches:
- Chocolate leaves or stems for realism
- Edible gold leaf or velvet spray for that luxury boutique look
How to Make Fruit Shaped Pastries
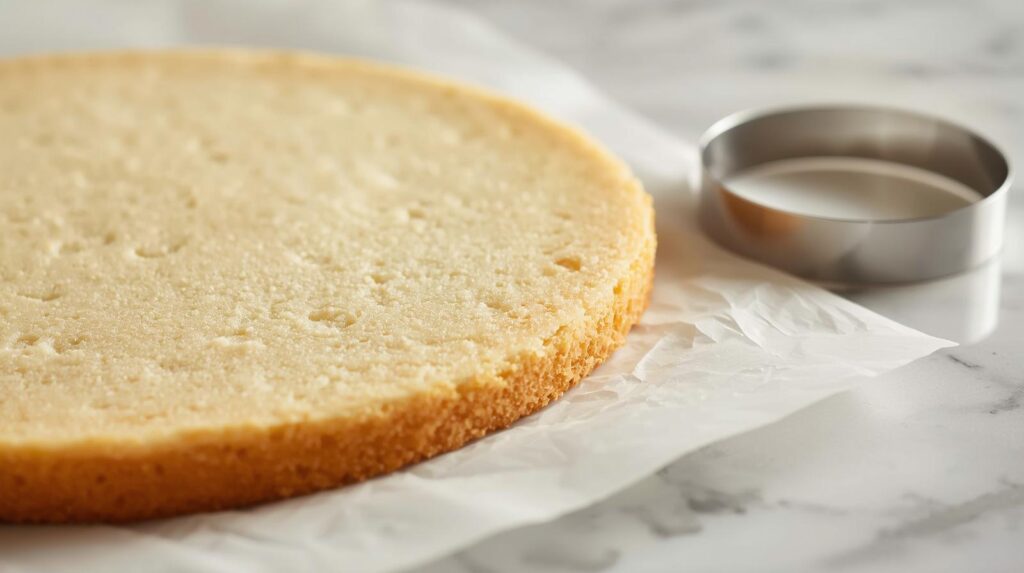
Step 1 : Prepare the Sponge Base
Start by whisking your eggs and sugar together until the mixture becomes pale, light, and almost doubled in volume. This aeration is what gives your sponge its characteristic lightness, so do not rush through it.
Gently fold in the flour and melted butter, being careful not to deflate all that beautiful air you just worked to create. Bake the batter in a thin, even layer at 170°C for 10 to 12 minutes just long enough for it to set without drying out.
Once out of the oven, let it cool completely before touching it. Then use a round cutter to punch out small circles sized to fit your silicone molds. These humble little rounds become the hidden foundation of your entire creation.
Step 2 : Make the Fruit Insert
Warm your fruit puree and sugar together in a small saucepan until the sugar dissolves and the mixture is fragrant and vibrant. Remove from the heat and stir in your hydrated gelatin until completely smooth.
Pour the mixture into small round molds slightly smaller than your main fruit molds and transfer them to the freezer. They need to freeze completely solid before assembly, so give them at least two hours or prepare them the night before.
Step 3 : Prepare the Mousse
Gently heat your fruit puree with sugar until warm, then dissolve the hydrated gelatin directly into it and set aside to cool slightly. You want it cool enough not to deflate your cream but still fluid enough to fold smoothly.
Whip your heavy cream to soft, billowy peaks not too stiff, not too loose. Then fold your cooled fruit mixture into the cream with a gentle hand, working in slow circular motions until everything is just combined and beautifully uniform in color.
Step 4 : Assemble
This is where the magic truly begins. Fill each fruit shaped silicone mold halfway with mousse, spreading it up the sides to avoid air pockets. Press your frozen fruit insert into the center, then lay your sponge circle on top.
Cover everything with a final layer of mousse, smoothing the surface completely flat. Transfer your filled molds to the freezer and leave them for at least six hours or ideally overnight. The pastries must be frozen completely solid before glazing, or the finish will not hold.
Step 5 : Glaze and Finish
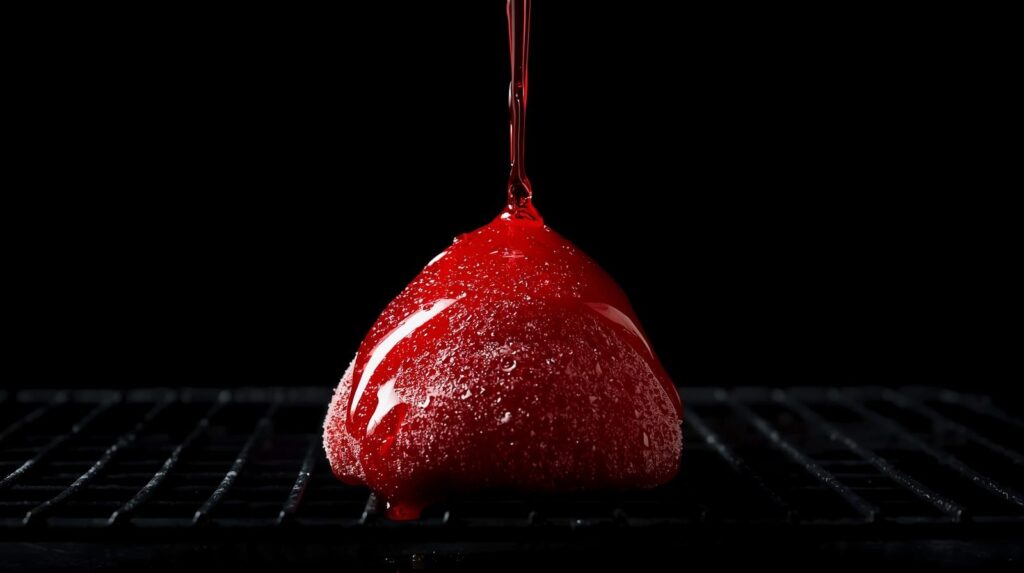
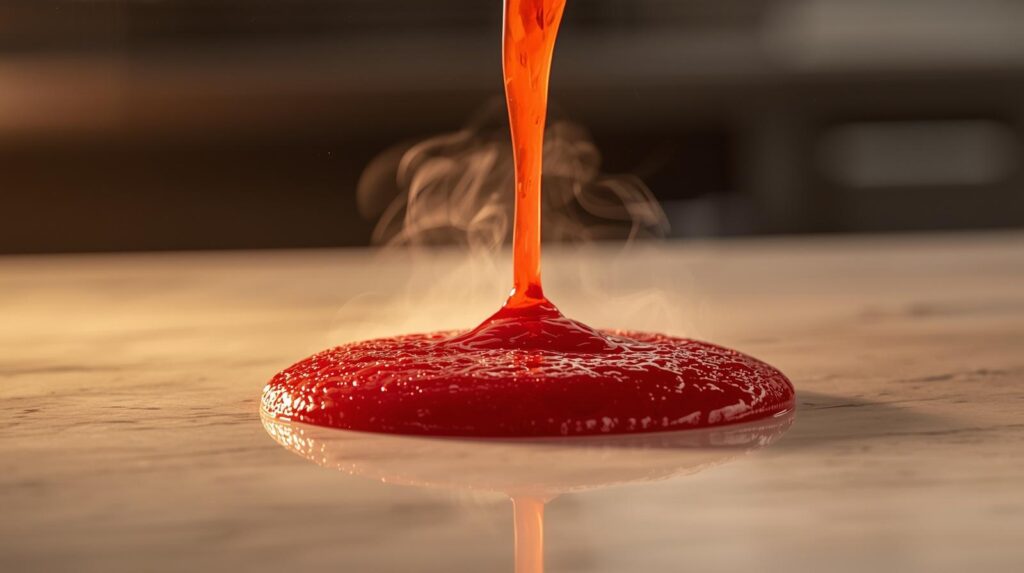
Prepare your mirror glaze by combining sugar, glucose syrup, and water in a saucepan over medium heat until it reaches a gentle boil. Pour over your chopped white chocolate and condensed milk, add your bloomed gelatin, and blend until perfectly smooth. Stir in your chosen natural food coloring until you reach the exact tone of your target fruit.
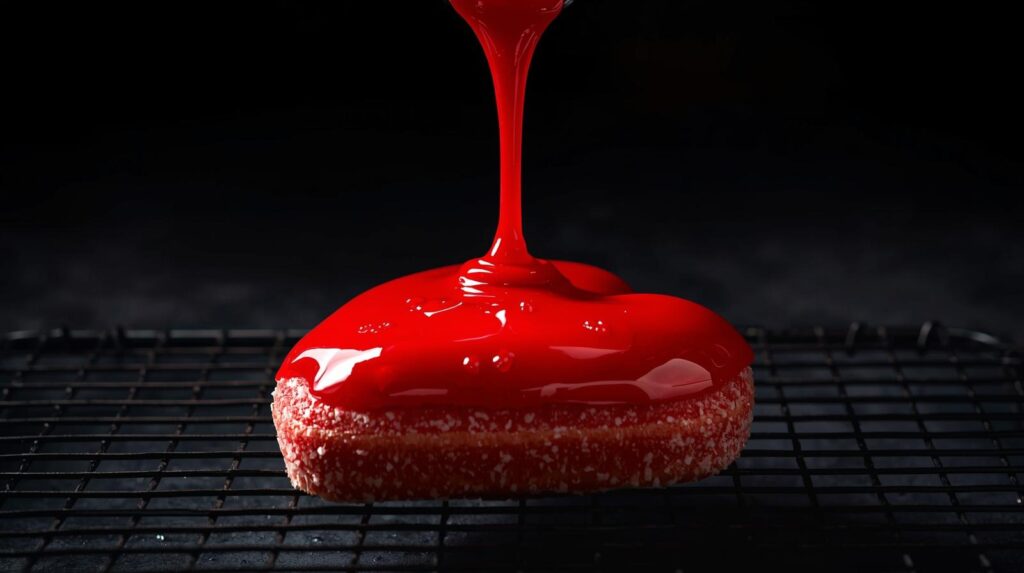
Allow the glaze to cool to between 32 and 35°C this is the critical temperature window where it flows beautifully and sets with that signature glossy finish. Unmold your frozen pastries and glaze them immediately, working confidently and quickly. Add a chocolate stem or leaf to complete the illusion, and step back to admire what you have just created.
Why Fruit Shaped Pastries Are So Popular
There is something genuinely captivating about a dessert that makes people stop mid conversation and reach for their phone before they even think about taking a bite. Fruit shaped pastries do exactly that every single time.
They are inherently photogenic in a way that no other dessert style quite matches. The combination of hyper realistic visual presentation with genuinely refined flavor creates something that works equally well as a social media moment and as a genuinely satisfying culinary experience.
Beyond the visual impact, these pastries represent a new chapter in the story of pastry art one where technical skill and creative vision are given equal weight, and where a dessert can genuinely be considered a work of art without sacrificing the pleasure of eating it. For boutique bakeries, food bloggers, and home bakers with a passion for pushing boundaries, they offer something rare endless creative possibilities within a clear and learnable framework.
Final Thoughts
Fruit shaped pastries are living proof that the most memorable food experiences are the ones that engage all the senses at once. The visual surprise, the delicate texture, the layered flavors everything comes together in a way that feels both magical and deeply satisfying.
Whether you are building a bakery business, creating content for a food blog, or simply exploring your passion for pastry at home, mastering this style of dessert will open doors to a level of creativity you may not have imagined possible in your own kitchen.
Start with a fruit you love, trust the process, and do not be discouraged if your first attempt is not perfect. Every glaze teaches you something. Every unmolding is a small victory. And every finished fruit shaped pastry however it turns out is a testament to your willingness to try something truly extraordinary.
If you enjoyed learning about fruit shaped pastries, there is so much more waiting for you. Explore our full collection of irresistible dessert recipes and find your next edible masterpiece at step44.com.
👉 Pineapple Cake Recipe a moist, naturally sweet cake made with wholesome ingredients and fresh tropical flavor. Perfect for a light yet satisfying treat.
👉 Try our Cherry Pie Mini Tarts buttery crust, rich cherry filling, and elegant presentation. A beautiful balance between classic comfort and modern pastry art.
👉 Discover our Crunchy Kunafa Tiramisu Recipe a unique fusion dessert combining crispy golden kunafa layers with creamy tiramisu filling for a luxurious Middle Eastern Italian twist.
Your email will not be published publicly.