
No Bake Dragon Fruit Mini Cheesecakes | 12 Easy Bites.
⏱ 45 min prep | ❄️ 4 hours chill time | 🍰 8 servings | ⭐ 4.9/5
Did you know that searches for vibrant, tropical desserts have skyrocketed by over 150% in recent months? People are craving colorful, Instagram worthy treats that are surprisingly simple to make.
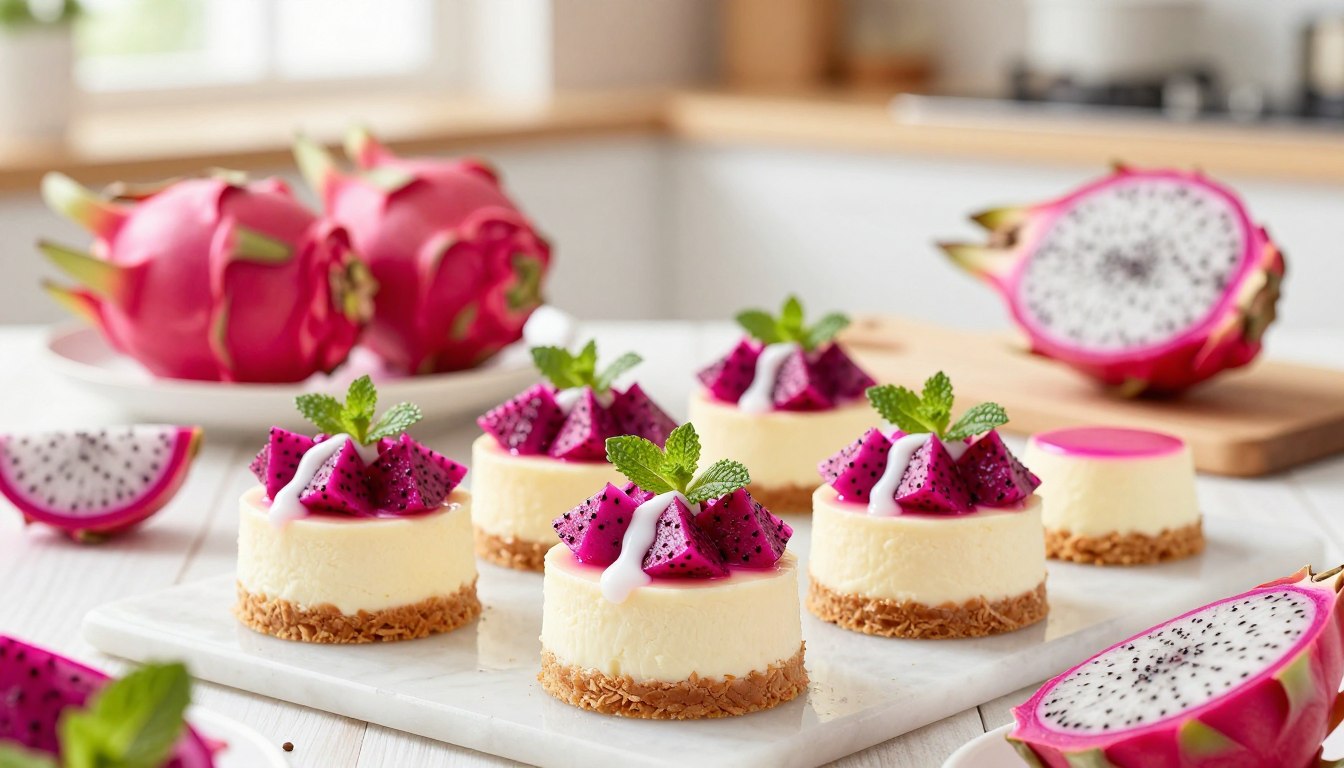
This guide shows you how to create stunning, no bake bites that look like they came from a professional bakery. The secret is using fresh dragon fruit for its brilliant purple hue and sweet, delicate flavor.
You can follow the perfected formula shared by culinary enthusiast Javier Tan in September 2024. His approach makes this refreshing dessert accessible to everyone, regardless of skill level.
Using real cream and pitaya ensures every single bite is both visually spectacular and deliciously thirst quenching. It’s the perfect, impressive treat for your next summer gathering.
Introduction to no bake dragon fruit mini cheesecakes
Sophie’s recipe for four perfect portions brings gourmet style to your kitchen with minimal effort. You can create these stunning bites in about four hours and twenty minutes, with no oven required.

- Love this recipe? You’ll also enjoy our Blackberry velvet cake, Cherry Pie Mini Tart, and Bread & Baking French Macarons Recipe
- Ready to make perfect mini cheesecakes? 👉 Buy the Pro Mini Cheesecake Pan
Origins of this tropical treat
This specific formula was crafted for small, intimate gatherings. It delivers a creamy cheesecake filling paired with vibrant dragon fruit for a true taste of the tropics.
The idea was to make a portion controlled dessert that feels special. It’s ideal for summer parties or a sweet treat any time.
What makes these cheesecakes unique?
The unique texture comes from softened cream cheese, one cup of heavy cream, and a bright splash of lemon juice. A single teaspoon of vanilla extract adds a rich, velvety consistency.
You prepare a separate dragon fruit layer by pureeing the fruit with a bit of sugar. This creates a beautiful, natural color contrast without any artificial dyes.
Balancing the sweetness is key. The lemon juice and vanilla extract work together to cut through the richness of the cream cheese.
Ingredients like coconut enhance the tropical theme. Your final dessert will be as delicious as it is eye catching.
Essential ingredients & preparation techniques
Success in this recipe hinges on two fundamental components: a sturdy, buttery base and a perfectly smooth, creamy filling. Getting these ingredients and techniques right ensures your dessert has the ideal texture and stays stable.
Crafting the perfect crust
You can choose your method. Javier Tan uses 120g of melted butter with 175g of crushed biscuits. Sophie uses 1.5 cups of graham crackers and 5 tbsp of butter.
The key is to combine the crumbs and butter until the mixture resembles wet sand. Press it firmly into the bottom of your molds for a solid foundation that won’t crumble.

Creamy filling tips and tricks
Start by beating the cream cheese and coconut cream until completely smooth. Any lumps here will affect the final feel.
For a firm set, dissolve gelatin in one cup of warm water. Let it set aside for about five minutes before stirring it into the cheese blend. This prevents curdling.
Gently fold in the vibrant dragon fruit puree and a splash of lemon juice. This creates a beautiful, natural layer. For a decadent twist, a chocolate drizzle adds wonderful flavor contrast.
Step by step guide to making dragon fruit mini cheesecakes
Follow this clear sequence to transform your ingredients into a stunning dessert. The process is simple and focuses on two main phases: mixing the components and letting them set properly.
Mixing and assembly procedures
Start by pressing your crumb crust firmly into the bottom of each muffin cup. You should refrigerate this base for about thirty minutes so it holds its shape perfectly.
Next, whip the heavy cream until it forms soft peaks. Gently fold this into your smooth cream cheese and coconut cream mixture.
Add one tsp of vanilla extract and a splash of lemon juice for a balanced, bright flavor. Ensure the filling is completely smooth for the best final texture.
For the vibrant layer, swirl the prepared dragon fruit puree into the cheesecake mixture. This creates a beautiful marble effect without any artificial color.

Chilling, setting, and finishing touches
Carefully spoon the filling over the chilled crust. Then, set aside the assembled treats in your refrigerator.
They must chill for at least four hours to become fully firm. This patience is the key to a perfect cheesecake that slices cleanly.
If you’re making a vegan version, note that each small bar offers a nutritious option with about 272 calories and 16g of fat per serving.
Once set, garnish your creation with fresh fruit, mint leaves, or a delicate chocolate drizzle. These final touches add an extra pop of visual appeal and flavor.
Conclusion
You’ve just mastered a delightful tropical dessert that’s as easy to make as it is beautiful. This cheesecake combines a crunchy crust with a smooth, creamy filling for a perfect treat.
By following this recipe, you learned to balance sugar sweetness with the tartness of lemon juice. The vibrant dragon fruit layer adds a natural pop of color and flavor.
Remember, chilling for several hours is the secret to that ideal firm texture. It ensures every slice holds its shape beautifully.
Whether you used traditional cream cheese or a coconut alternative, the result is a colorful dessert. It’s sure to impress at your next gathering.
We hope you enjoy making these as much as we enjoyed sharing the techniques. Feel free to experiment with different toppings or crust variations to make it your own.
Your email will not be published publicly.